
1.Unified Workspace
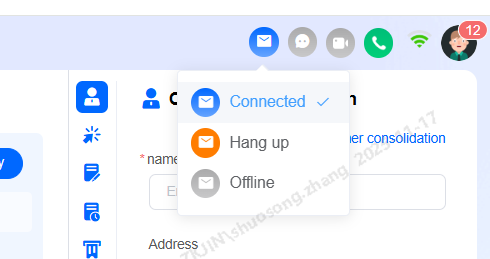
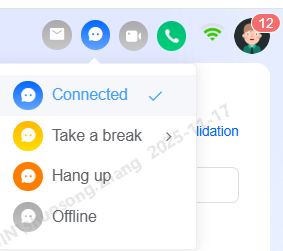
Upon logging into the Instadesk platform, an agent's status is displayed in the top-right corner. The default status is Offline (configurable). Available statuses include Ready, Busy, Break, and Offline, as shown in the figure below:
1.1 Agent Status
-
Ready: Can receive and make phone calls;
-
Busy: Can only make phone calls
-
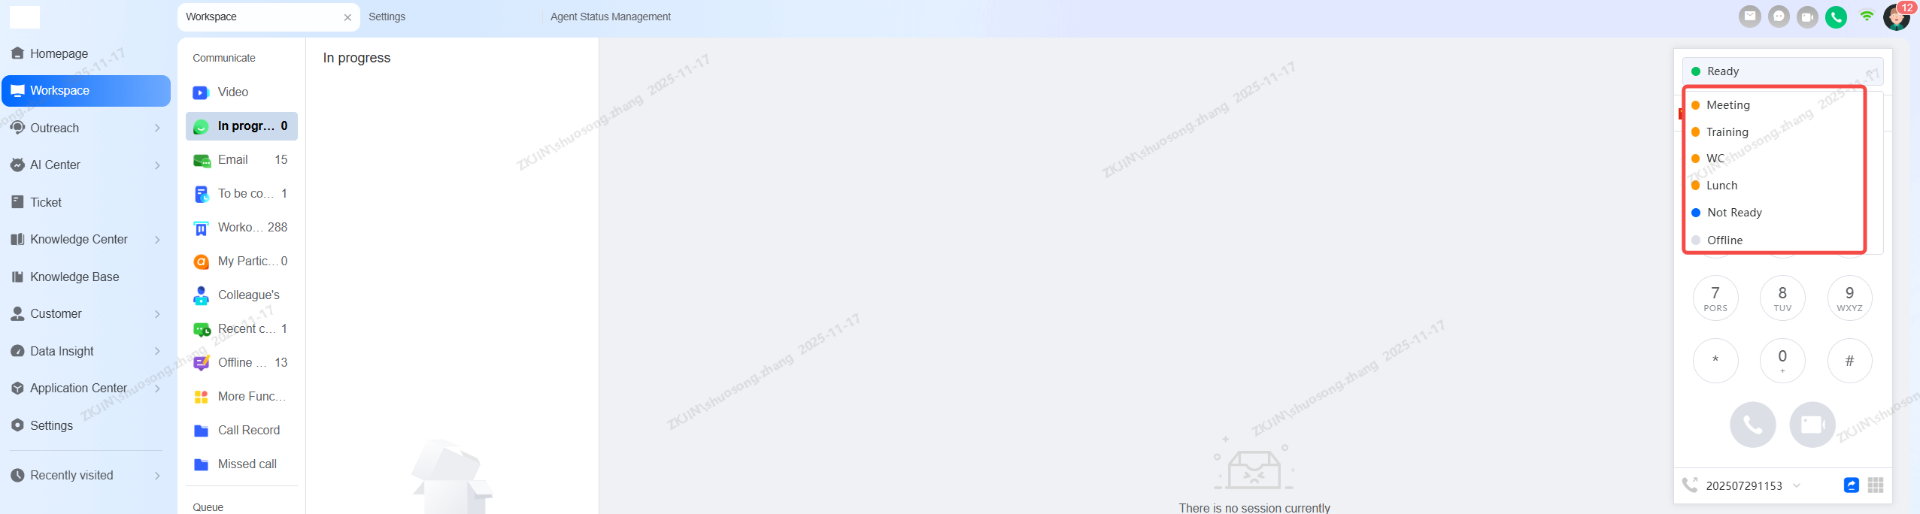
Break (Agent Personal Settings): For non-work activities (e.g., meetings, training). Sub-statuses (e.g., lunch) are available if enabled.
-
Offline: Attendance is not recorded. Must sign in to select an active status.
Note: Agents without a skill group or valid voice input device will be displayed as offline when logging in.
Additionally, after the agent answers a call, the system enters a configurable Post-Call state (Configurable on the Skill Group page). In this state, the agent can record details of the previous call. Once the pre-set duration ends, the agent's status will be set to Ready to receive the next call.
By clicking Desktop, agents access the unified workspace to handle both phone and online chats, view customer profiles, communication history, past tickets, and record business information.
1.2 Answer a Call
When an agent's status is Ready, an incoming call will trigger an incoming sound with a screen pop-up. The agent can click the answer button to accept the call. If the auto-answer feature is enabled, the call will be connected immediately without requiring a manual click.
1.3 Make a Call
1.3.1 Call Customer
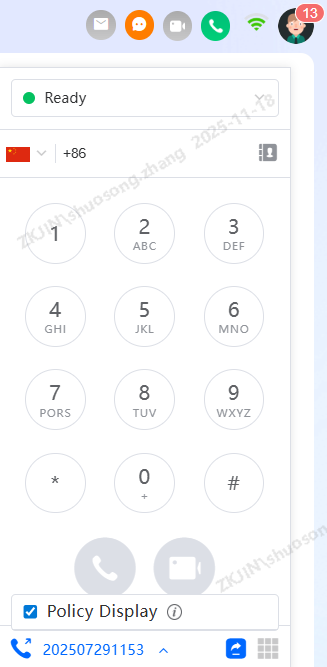
Agents can log into the Workspace and use the Dial Pad in the top-right corner to make outbound calls.
Before dialing, select the desired phone line and caller ID (the number displayed to the customer). The customer will see the caller ID associated with the selected outbound line.
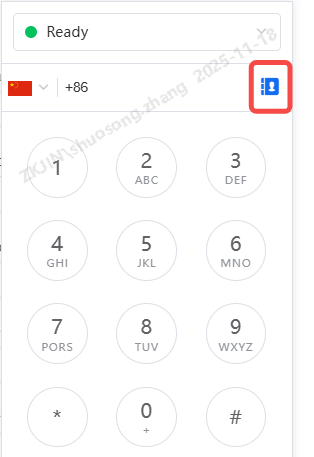
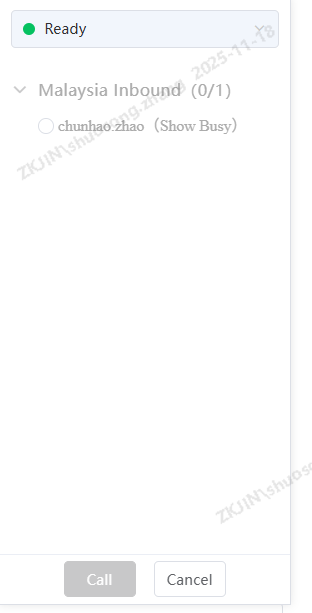
1.3.2 Call Agent (Internal Call)
For internal calls, agents can click the Contacts tab above the dial pad and select a colleague from an internal skill group to place the call.
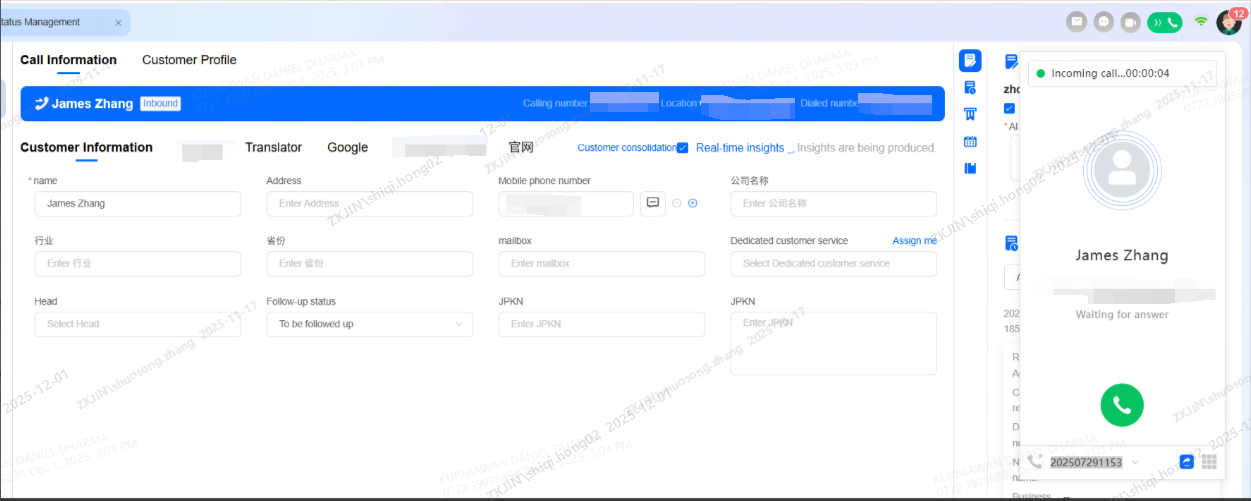
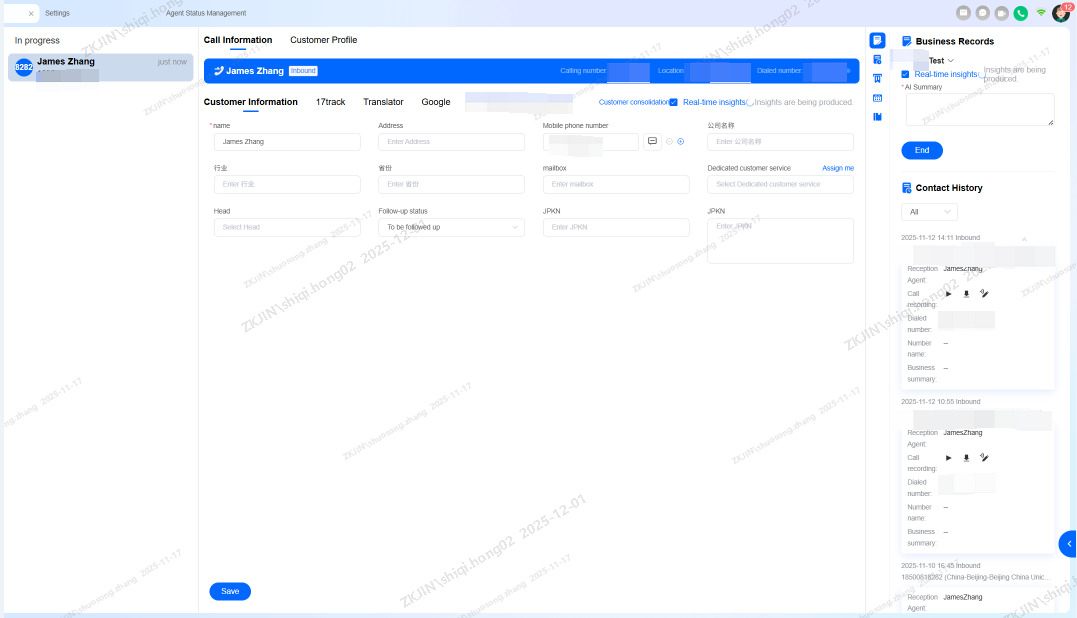
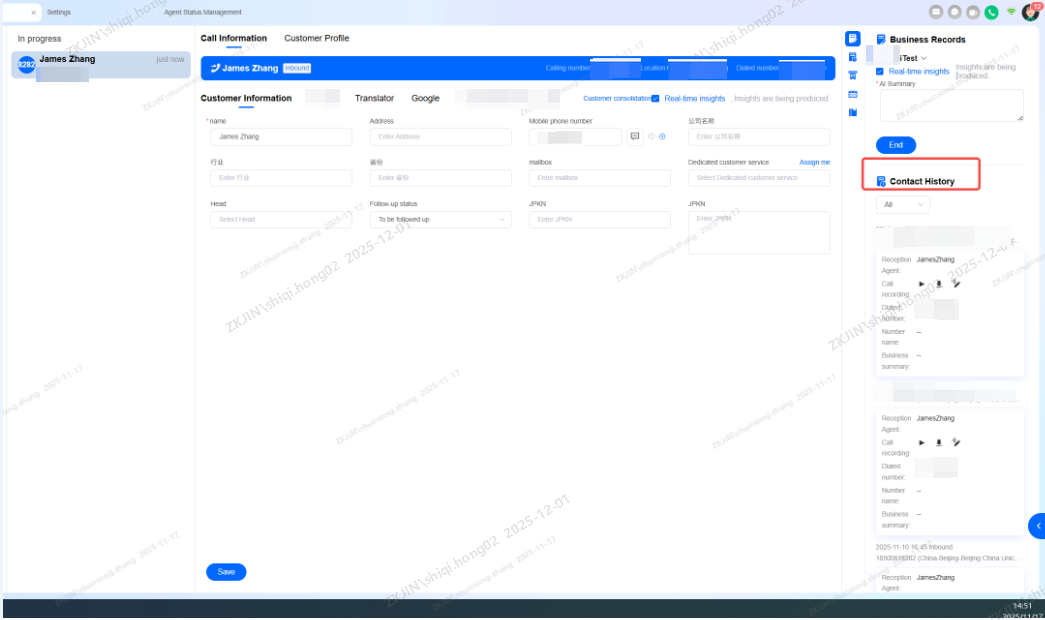
1.3.3 Call Pop-up Screen
The call pop-up screen layout is customizable. Administrators can visually configure it in: Configuration Management > Global Settings > Workspace Layout
The pop-up screen can display the following information:
-
Call Information
-
Customer Information
-
Business Records
-
Contact History
-
Associated Tickets
-
Follow-up Plans
-
AI Knowledge Base
-
Information List
-
Data List
-
Intelligent Interaction Record
-
If the incoming call originates from an automated outbound task, the pop-up screen will show a Name List Information area, displaying the contact's name, number, and notes.
-
If the call was first handled by an intelligent voice bot, an Intelligent Interaction Record section will appear, showing the voice interaction transcript, bot name, and identified customer intent. This helps the agent quickly understand the context.
-
For a manually dialed call, the Contact Information and Intelligent Interaction Record sections are not displayed.
-
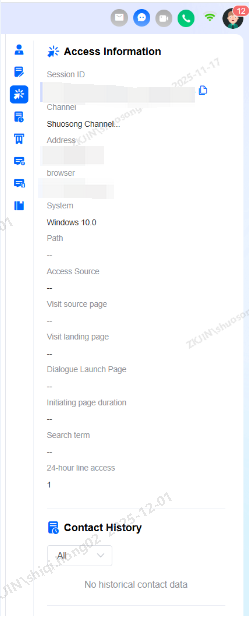
The right side of the pop-up consistently shows Customer Information, Call History, Ticket Record, and Follow-up Plan.
-
The Customer Information fields are customizable (text, dropdown, checkbox, etc.). Agents can fill and save this data. If number masking is enabled, plain-text numbers are hidden.
-
The Call History section displays all previous calls between the customer and your agents. Click any entry to view call details, listen to the recording, and review or modify its associated business records.
The Ticket Record section displays the customer's complete ticket history. Click any ticket to view its details. Select New Ticket to create a ticket, fill in the relevant information, and assign it to a specific group or agent.
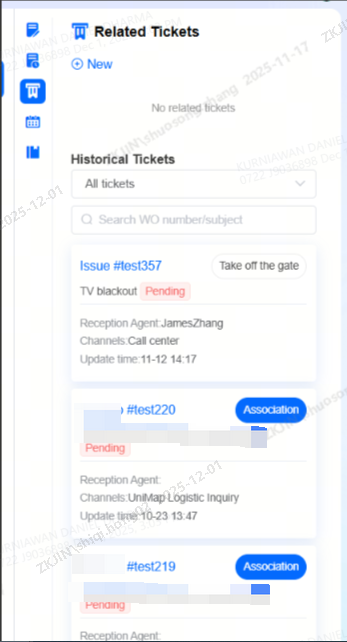
The Follow-up Plan section shows all follow-up records for the customer. Click New Follow-up Record to create a plan, where you can set both Follow-up Time and Reminder Time. When the preset time is reached, the system will automatically remind the agent.
1.4 Reception Session
Customer inquiries from both web chat and email can also be handled within the Workspace.
Before handling these inquiries, ensure you have configured the respective online channels and their assignment rules in Settings > Channel Integration.
When a customer call is connected to an agent, the conversations are listed in descending order by access time. Each entry shows the customer's avatar, channel identifier, name, last message, last message time, and the unread message count.
1.4.1 Chat Session Reception
1.4.1.1 Reception Session
Agents can handle all web-based channels in the Chat section of the Agent Workspace. Before starting, ensure your online status is set to Connected.
The current version (as of 2025/11/21) supports online sessions from the following channels:
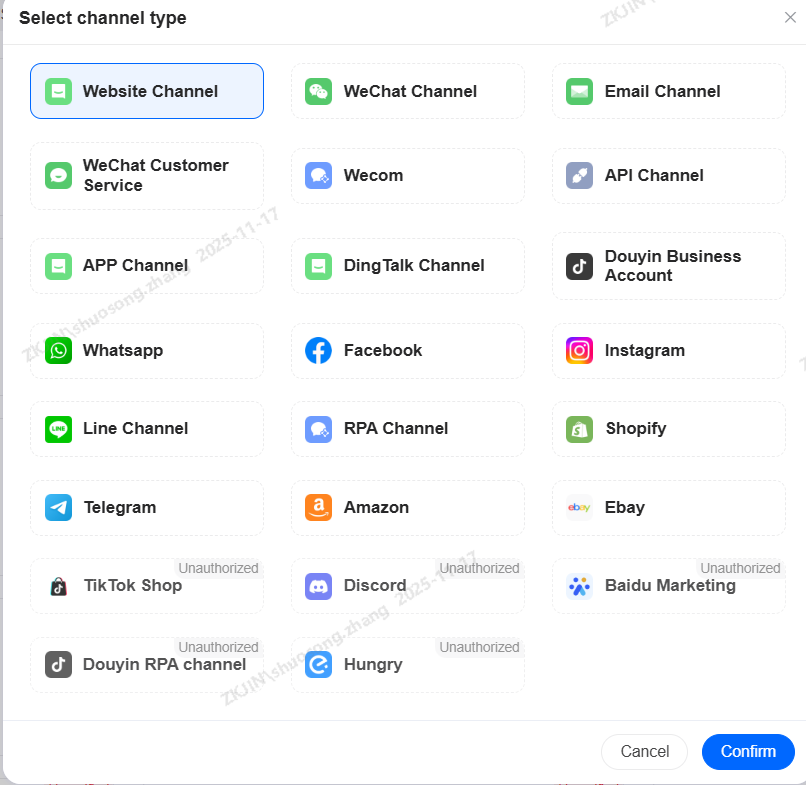
When an online session enters the system and an agent is available, it will appear in the In Progress queue, triggering a chat pop-up for direct communication with the customer.
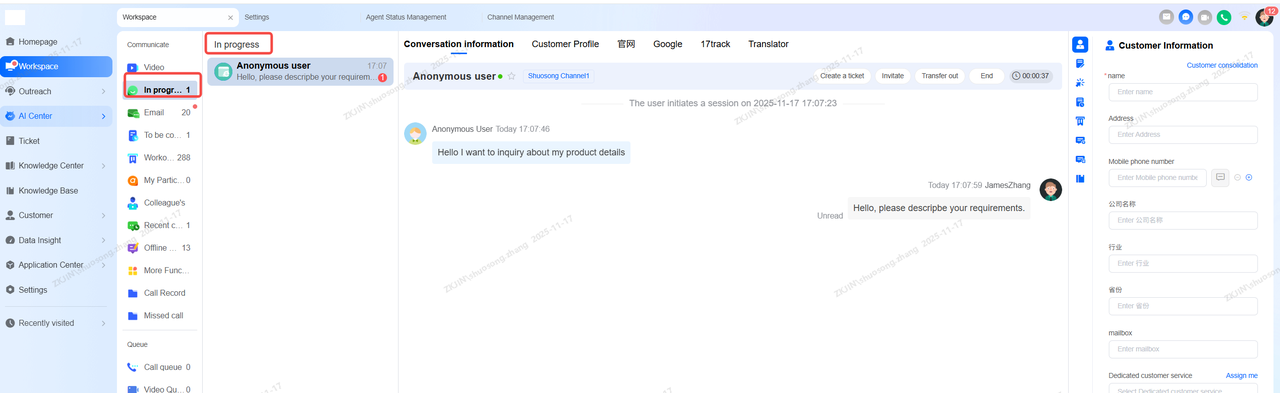
Similar to handling phone calls, agents can simultaneously view and update customer information, create tickets, and review contact history while engaged in an online chat.
1.4.1.2 Chat Area
Clicking on an active chat will open it on the right side to communicate with customer.

Chat Header
Displays the customer's name, online/offline status, star icon, number of repeat visits within 24 hours, and options to invite, transfer, or end the session.
Chat History
Shows the conversation. Agents can scroll to view the customer's full history, with the visible range controlled by their data permissions (personal, department, or all data), including interactions with other agents or bots.
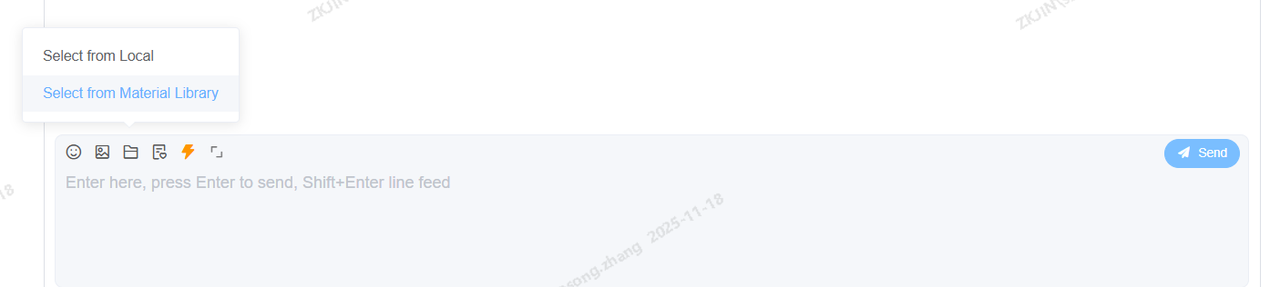
Reply Area
Allows agents to send emojis, images, files, and satisfaction surveys, or use quick replies. When quick reply matching is enabled, suggestions appear as you type. The area also supports sending content from the robot material library (if permitted by role permissions), images, videos, audio, and files.
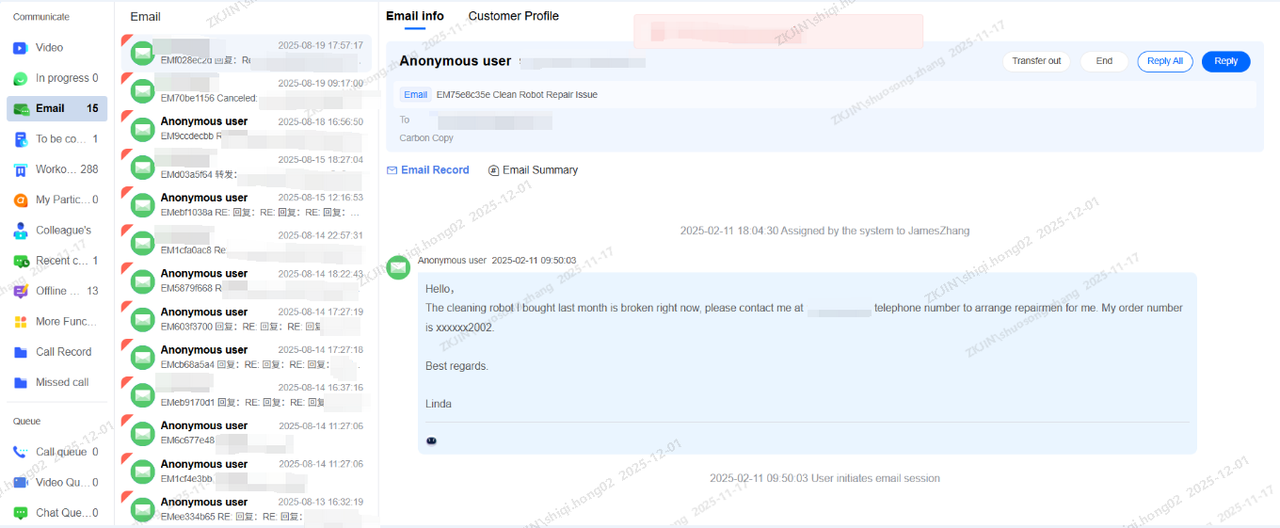
1.4.2 Email Session Reception
Agents can handle customer emails within the Workspace. To enable this, first bind the required email account in Channel Management > Email Channel > Email Chat. Subsequent emails sent to that address will then appear as conversations for the agents.
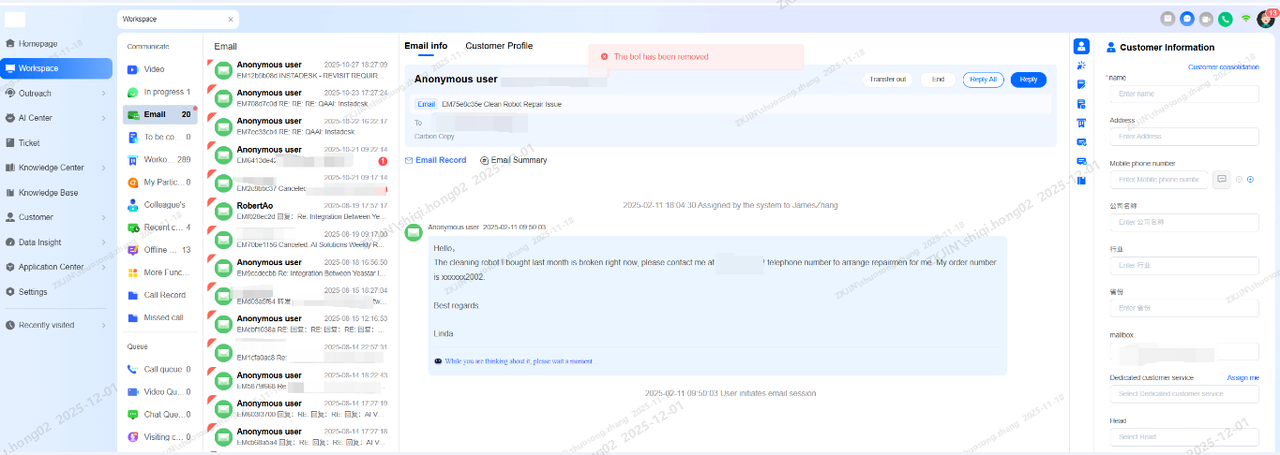
Replies entered by the agent will be sent directly to the customer as an email, using the bound email address as the sender.
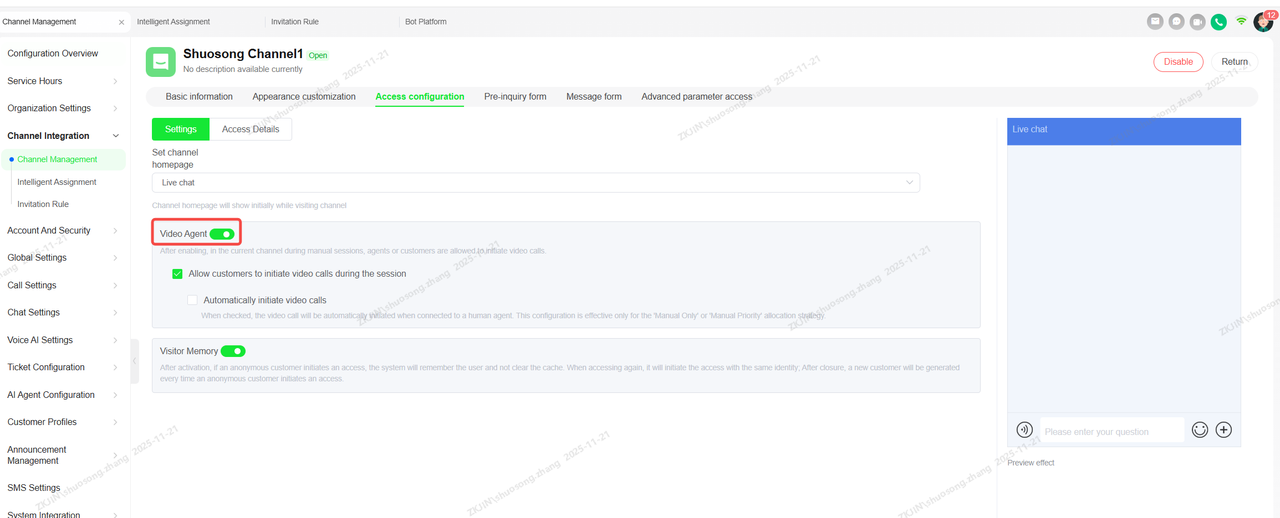
1.4.3 Video Reception
Video Customer Service is a key feature of Instadesk's international offering. This feature enables customers to directly initiate video or voice calls to support agents, allowing for visual guidance on issues like post-sales support and complex procedures
To enable this feature, first create an online channel in the Channels section and enable Video Agent option
1.5 Workspace Setup
The agent can click on Workspace Configuration to set up their own Workspace. The following settings are:
-
Global Settings
-
Call Settings
-
Session Settings
-
Email Settings
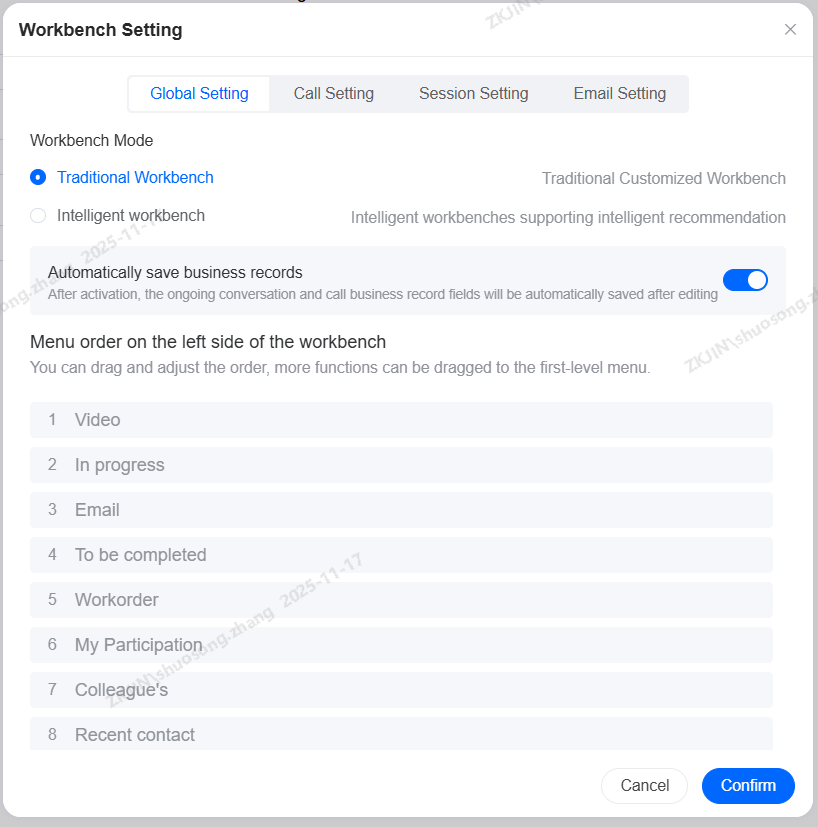
1.5.1 Global Settings
In Global Settings, you can toggle the Auto-Save Business Records feature and reorder the left-hand Workspace menus via drag-and-drop.
-
You can drag items from the More Functions section to the main menu, or move them back under More Functions. (Note: In Progress, Pending Completion, My Participation, Colleagues, and Recent Contacts cannot be moved).
-
When Auto-Save is enabled, any edits made to the fields in active conversation and call business records are saved automatically.
1.5.2 Call Settings
In Call Settings, you can configure the following options:
-
Extension Configuration
-
Auto Answer
-
Auto Screen Pop-up for Incoming Calls
-
Mini Dial Pad
-
Auto Sign-in on System Login
-
Set Default Sign-in Status
-
Dial Pad Flash Messages
-
Set Default Sign-in Skill Group
-
Timeout for Not Answering and Transferring to an External Line
-
Custom Ringtone

-
Extension Configuration: When disabled, agents default to web mode for browser-based calls. When enabled, agents can choose from:
-
SIP Phone Mode: Requires agents to bind their SIP number in their employee settings.
-
Mobile Extension Mode: Binds a mobile number, allowing calls to be forwarded to that phone even when the browser is closed.
-
Landline Extension Mode: Binds a landline number for call forwarding.
-
-
Automatic Answer: When enabled, incoming calls are connected automatically. (Note: This switch is not available for outbound skill groups, as all automated outbound task calls are auto-answered by default. This feature does not apply to inbound calls).
-
Mini Dial Pad: Support for setting up the use of a mini dial pad. The mini dial pad page size is approximately half the size of the standard dial pad, reducing page obstruction.
-
Automatic Sign-in on System Login: Support for setting up automatic sign-in via the dial pad when logging into the system
-
Default Skill Group for Check-in: If an agent belongs to multiple skill groups, they can set a default one. Once set, they will only receive calls assigned to that specific group, including:
-
IVR Inbound Calls
-
Automated Outbound Calls
-
Intelligent Outbound Call Transfer
-
Bot-to-Agent Transfer
-
Blind Transfer to Skill Group
-
Overflow Calls
-
Returning Customer Routing
-
-
Set Default Sign-in Status: Agents can choose their default status. If set to Ready, they will automatically be set to Ready upon signing into the Workspace. If set to Not Ready, they will automatically be set to Not Ready upon sign-in.
-
Flash Message Configuration via Dial Pad: When enabled, select a pre-configured flash message template (see SMS Settings > Template Management for setup). Once active, this message is sent automatically to the customer as their phone rings during an outbound call, helping to improve the connection rate.
-
Timeout for Not Answering and Transferring to an External Line: When enabled, if an incoming call is not answered within the ring timeout (28 seconds), it will be automatically forwarded to your configured mobile or landline. If the skill group also has ring overflow enabled, the external line transfer takes priority.
-
Custom Ringtone: Supports custom upload of agent ringtone, outbound call ringtone, call hang-up agent ringtone, and automatic answer agent ringtone
1.5.3 Session Settings
In Session Settings, agents can configure:
-
Sorting of Ongoing Sessions
-
Assisted Response Mode
-
Quick Reply Shortcuts
-
Concurrent Chat Limit
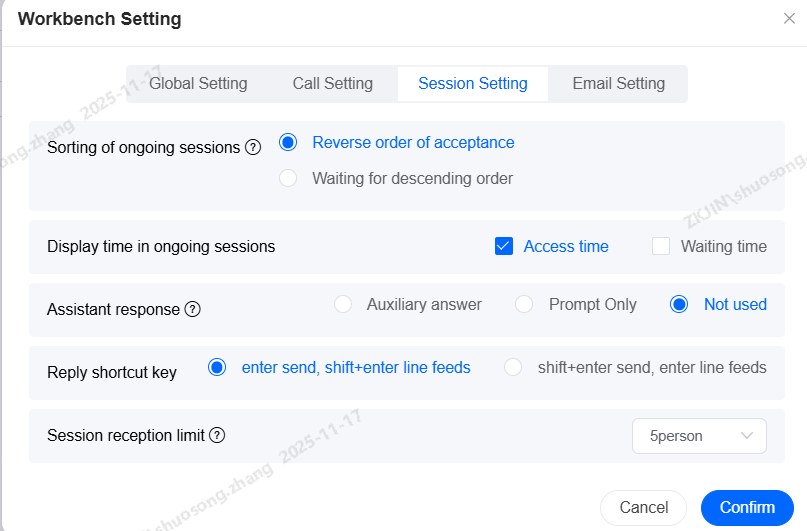
Session Settings allow agents to configure their chat interface:
-
Sorting of Ongoing Sessions: Choose between Incoming Reversed (newest chats on top) or Waiting Descending (chats waiting the longest for a reply on top).
-
Assisted Response Mode:
-
Disabled: No AI assistance.
-
Auto-Answer: The AI directly answers questions it knows, otherwise it provides suggestions.
-
Suggestions Only: The AI provides answer suggestions for all queries, which the agent can send directly or edit.
-
-
Quick Reply Shortcut: Set the keyboard shortcut for sending messages: Enter to send, or Shift+Enter to send (and Enter for a new line).
-
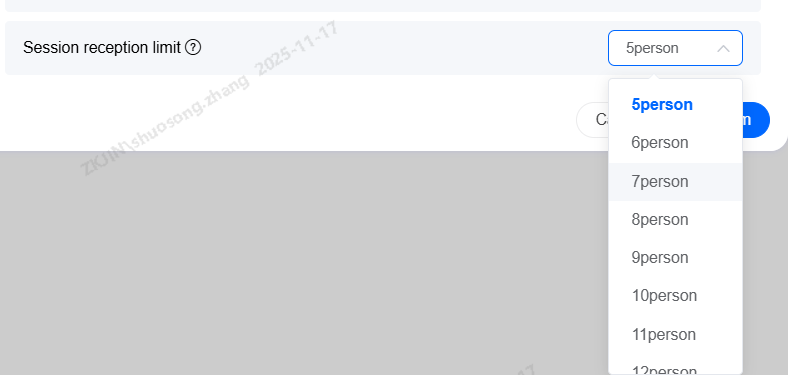
Concurrent Chat Limit: Agents can set a limit of 5 to 20 simultaneous chats. Excess chats are queued for the next available agent.
1.5.4 Email Settings
Emails to the support platform are integrated as conversations. Agents can set a reply mode to handle customer emails either manually or with automated responses.
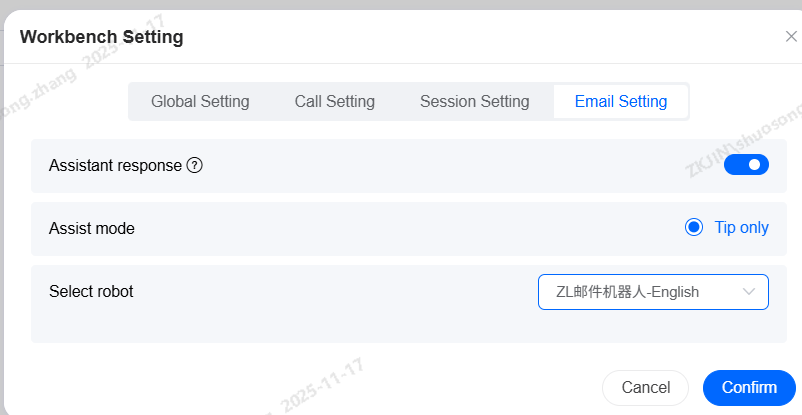
To enable email replies, set the email service status to Connected.