
System Settings
1. System Initialization
Upon deploying a new Instadesk system, configure the basic settings in the Configuration Management module for rapid agent onboarding and efficient platform use.
The initial setup includes configuring:
- Timezone
- Service Hours
- Organizational Structure, Departments, and Role Permissions
- Employees
- Skill Groups
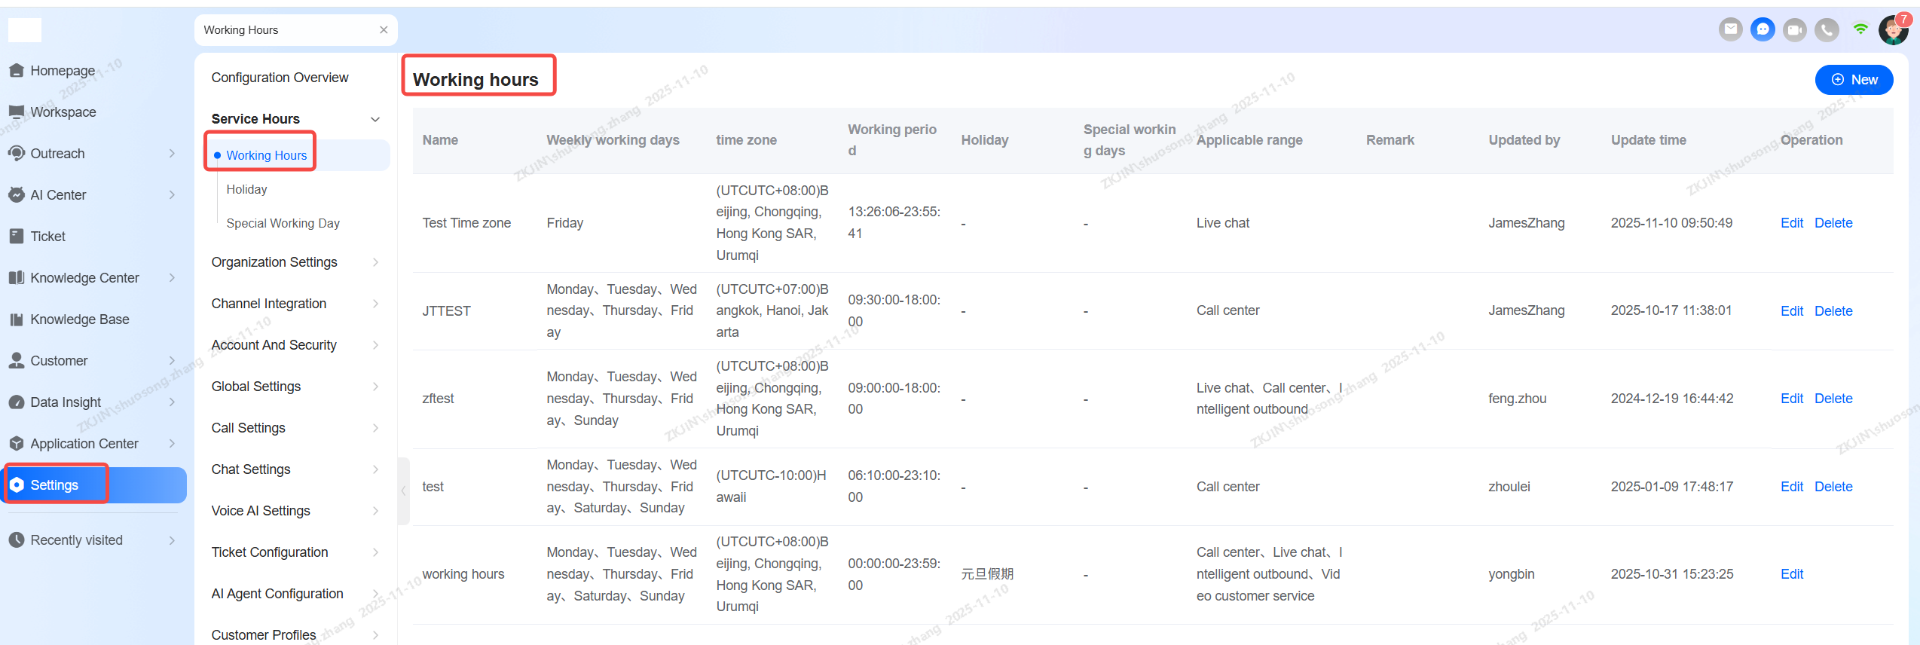
1.1 Service Hours
After the initial system setup, the administrator must configure the service hours based on the location and operational schedule of the customer service team. Navigate to Configuration Overview > Service Hours
1.1.1 Working Hours
Configure the weekly workdays (e.g., Monday to Friday), time zone (e.g., UTC+8), and work shifts (start and end times) for the respective customer service groups, along with their applicable scope.
1.1.2 Holidays
Configure specific holidays to accurately track agent working hours and time off.

1.1.3 Custom Working Days
Configure custom workdays to align agent schedules with local working arrangements in specific countries or regions.

With these configurations complete, the system administrator has finished setting up the time zone and business hour rules for the multi-region support teams.
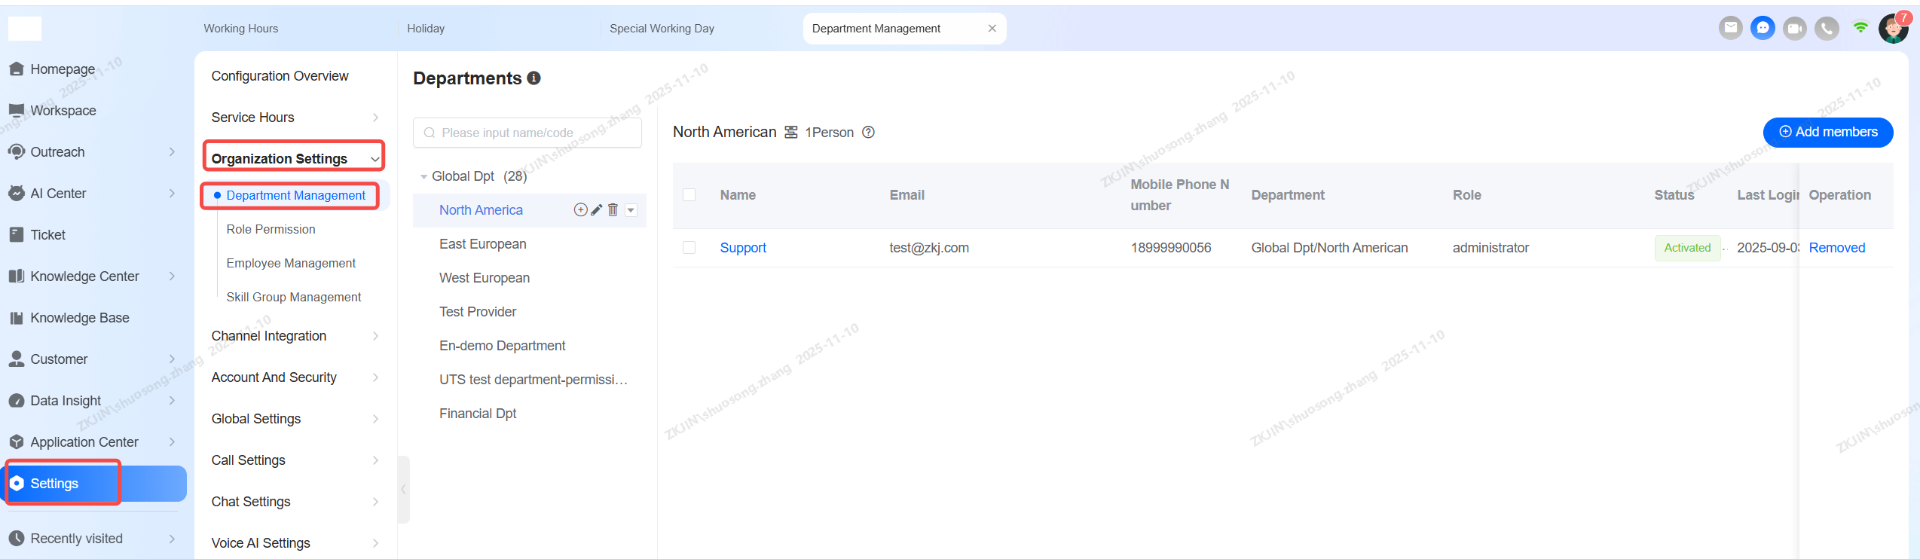
1.2 Department Management
The system administrator must first establish and maintain the company's organizational structure within the system.
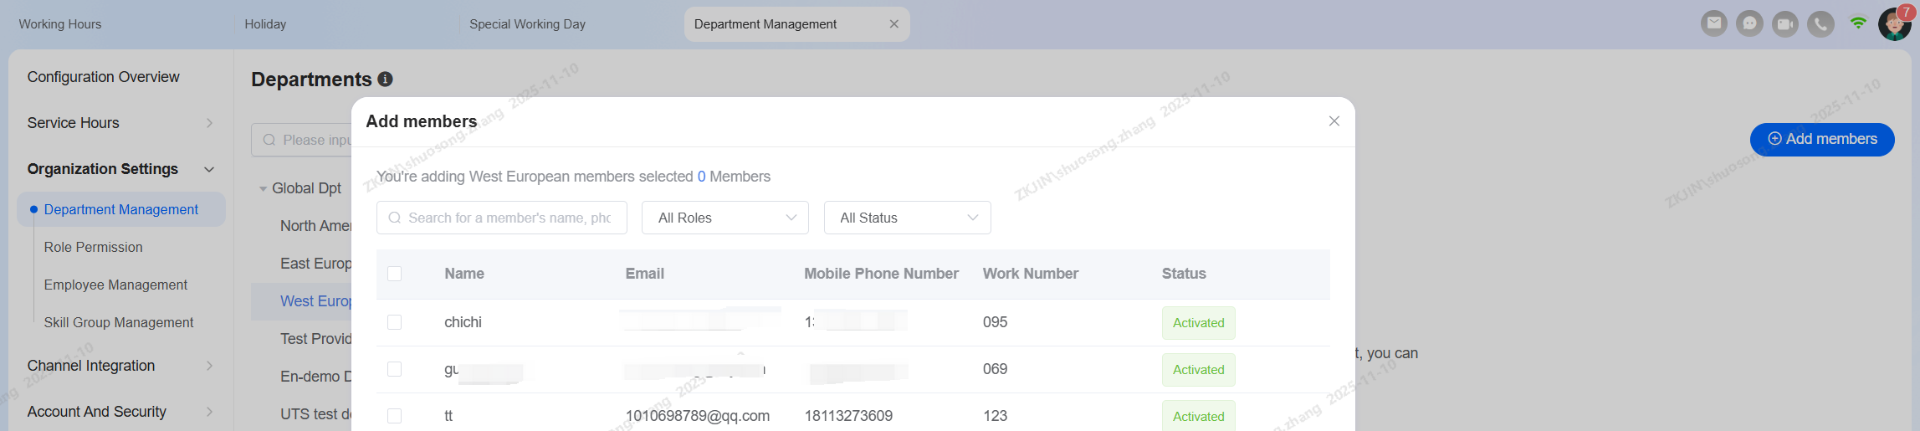
Within the organization chart, create and manage different departments to reflect your actual business structure, supporting up to 10 levels of sub-departments. Navigate to Configuration Overview > Organization Settings > Department Management.
To assign employees, use the Add Members function to add them to their respective departments. This can also be done during bulk employee account creation. This structure effectively assists managers in distinguishing data and permissions at a departmental level for subsequent access control and reporting.
1.3 Role Permission
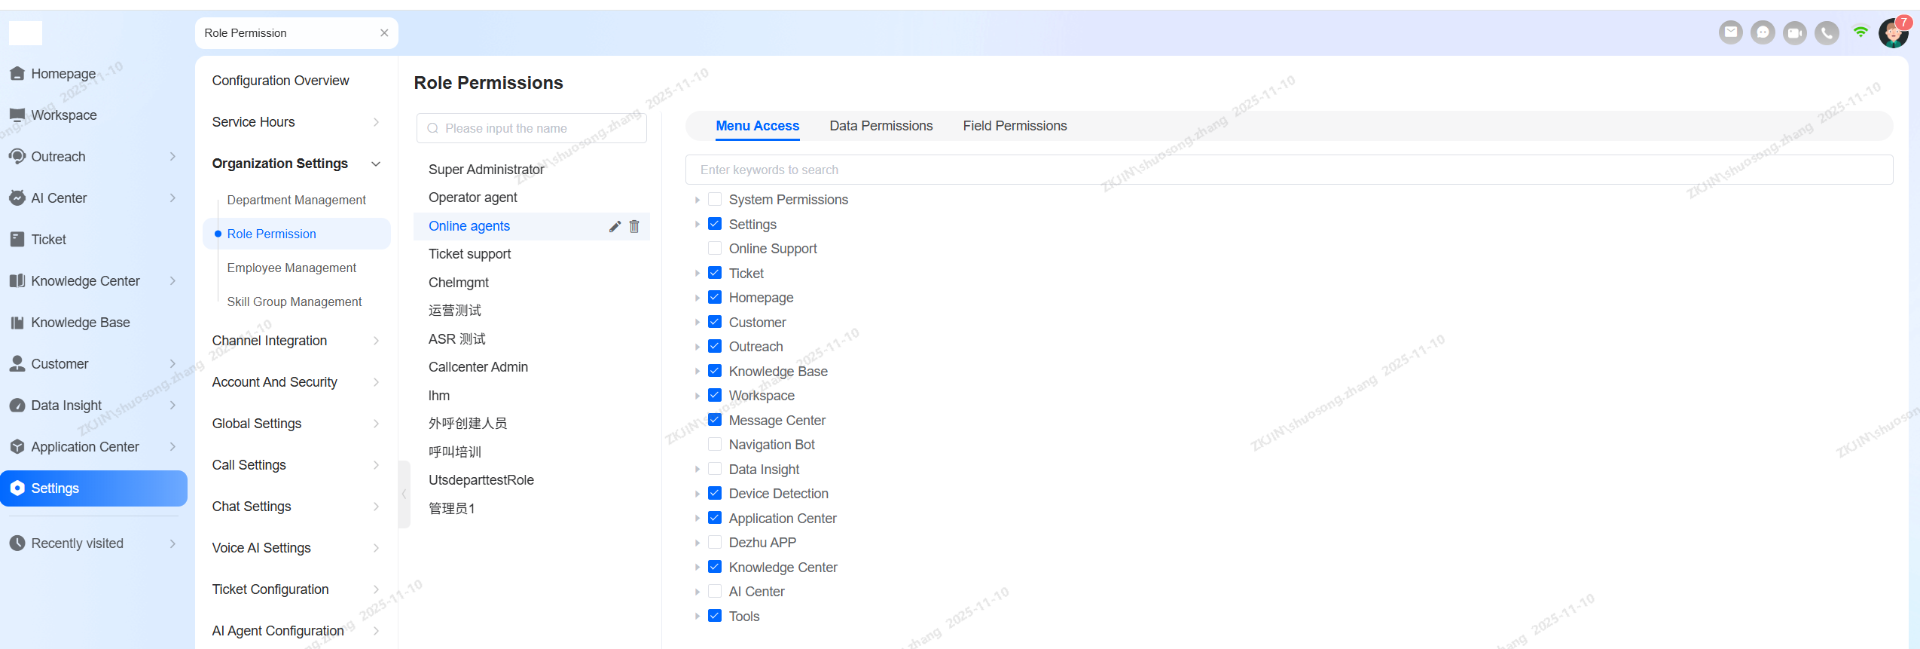
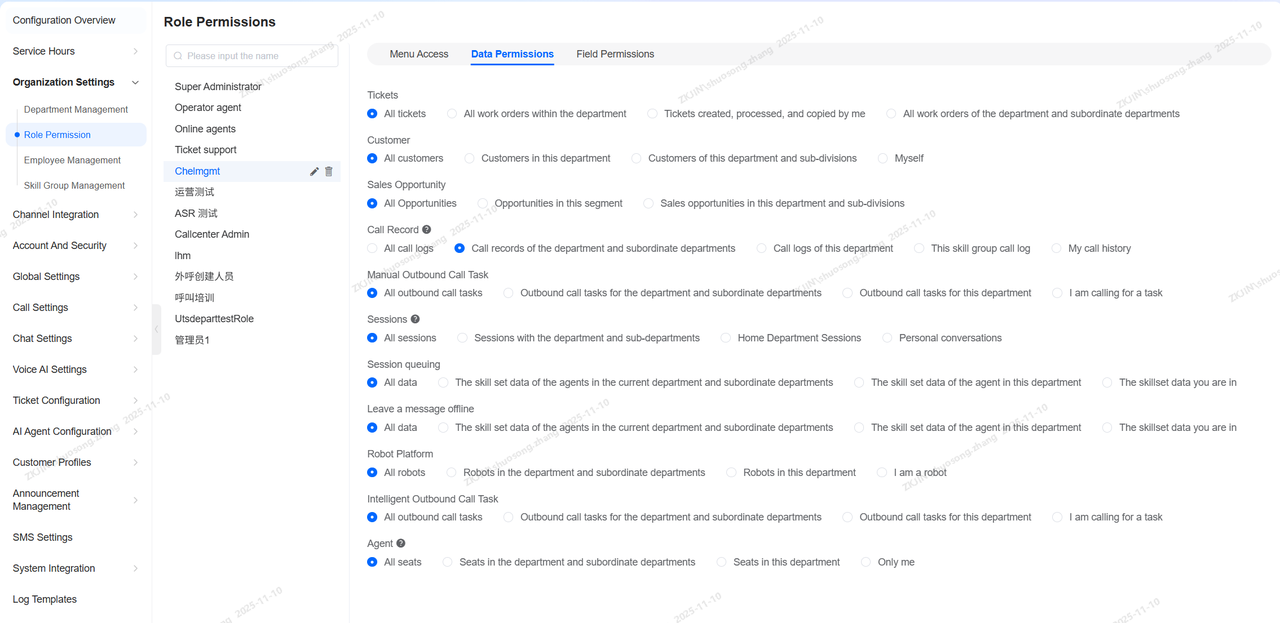
The system administrator must configure role permissions based on the responsibilities and access levels of different support team roles within the Role Permission. Navigate to Configuration Overview > Organization Settings > Role Permission
Permissions are divided into three categories:
- Menu Access: Determines which menus and functions are visible to the role.
- Data Permissions: Defines the data a role can view and actions it can perform (create, view, update, delete) within visible modules.
- Field Permissions: Controls the visibility of specific fields within allowed objects (e.g., Customer Management).
Note: The Super Administrator role has all permissions enabled by default, which cannot be modified or reduced. All other roles and their permissions can be configured according to actual business needs.
Related Operations:
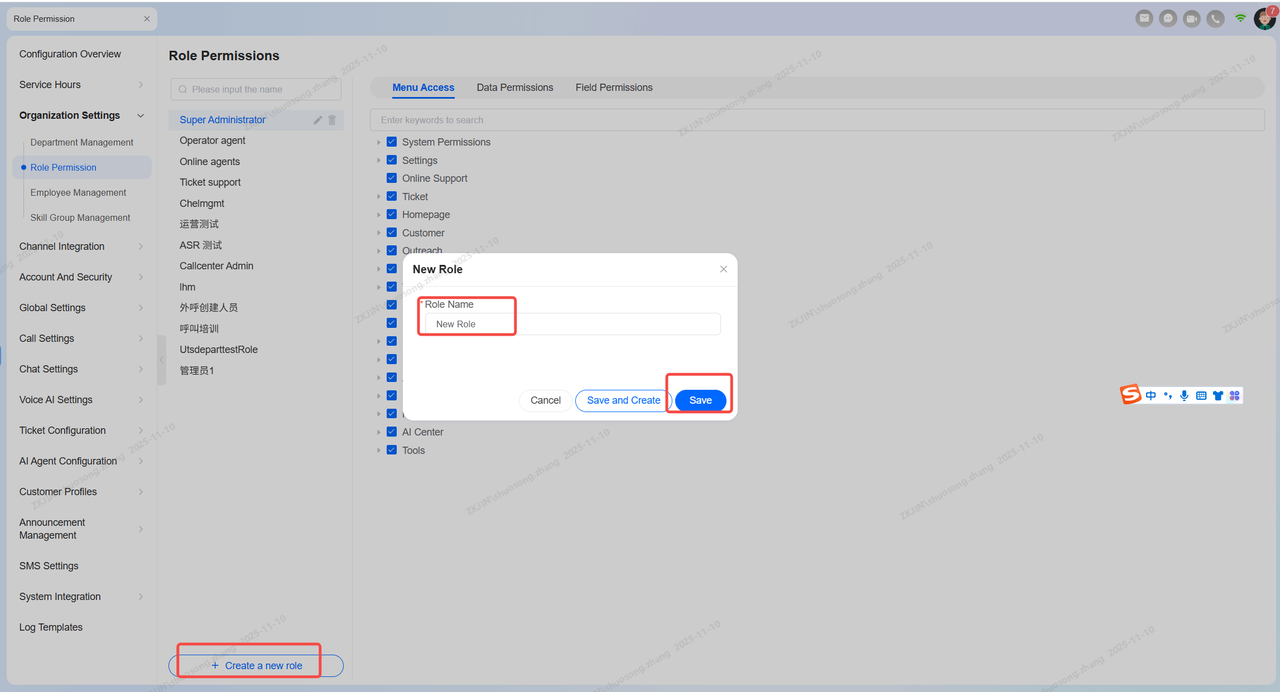
New Role
When a tenant first uses the system, they must input the enterprises' roles.
Navigate to Configuration Overview > Organization Settings > Role Permission > Plus button.
Modify Role Details
Menu Access:
After creating a new role, the next step is to configure its corresponding permissions. These should be assigned based on the role's job responsibilities.
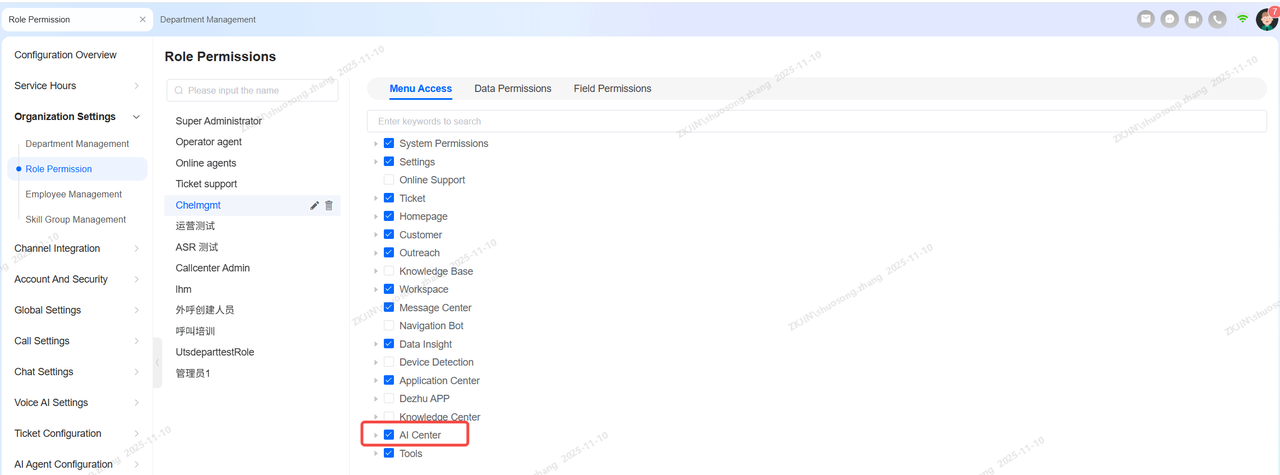
For instance, if a role should only manage the Bot Platform without access to AI Agent or Bot Marketplace functions, you can expand the menu to make these selections.

Data Permissions:
After configuring the Menu Access, proceed to set the corresponding data permissions based on the member's responsibilities. Select Data Permissions to view all available data access levels within Instadesk, and modify them as needed.
Field Permissions:
Finally, the administrator can configure Field Permissions for the customer module as needed. This includes setting whether specific fields should be hidden (e.g., for data anonymization) or if they are editable.

1.4 Employee Management
Once the organizational structure and permissions are configured, the administrator must add all relevant users for the customer service system in the Employee Management section.
The Employee List manages basic employee information such as name, email, phone number, ID, department, and role.
Add Employee
When a tenant first uses the system or when a new employee joins, create an account via the Employee List page. Click Add Account, fill in the employee's information, and and click Save (closes the pop-up) or Save and Continue (keeps it open to add another).
New accounts are enabled by default. The system automatically sends a notification email with login credentials. An employee assigned to multiple roles receives the combined permissions of all those roles. Click an employee's name to view their detailed profile.
Click on the employee's name to view their details
Navigate to Configuration Overview > Organization Settings > Employee Management > Add Account.
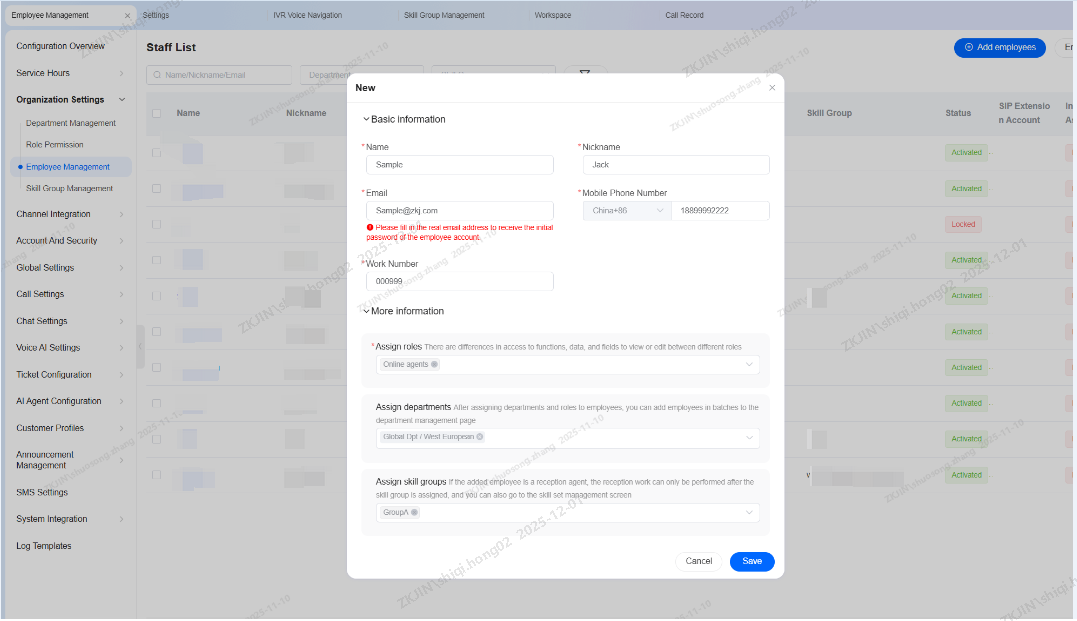
Click Save to create a new employee account.
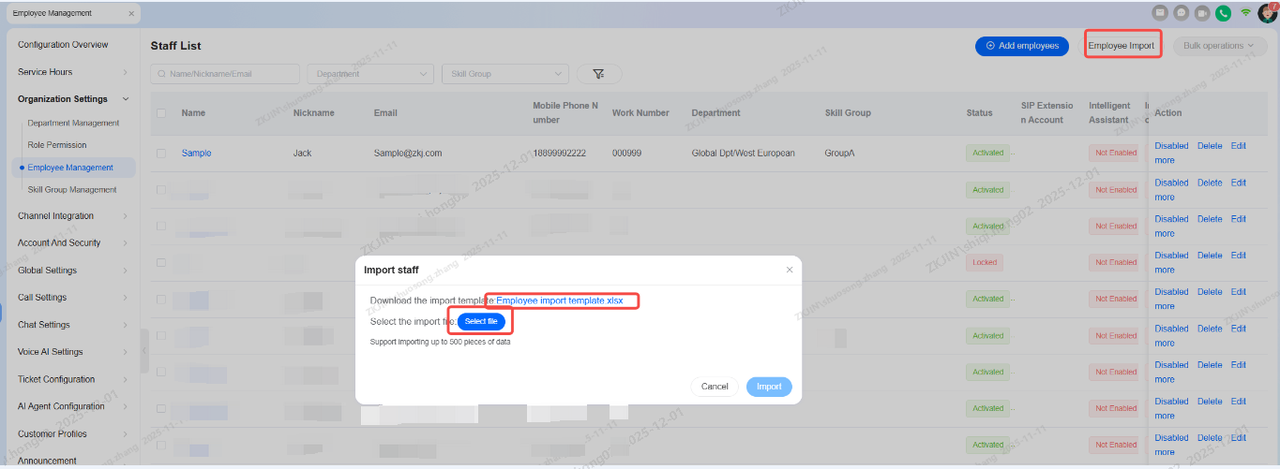
Bulk Add Employees
If you need to add multiple employees at once, you can import them in bulk via Excel. Click on Employee Import in the top right corner, download the employee import template in the pop-up window, and enter the employee information in the template as required. A maximum of 500 employees can be imported at a time.
Bulk Modify Employees
When the user needs to bulk modify employees within the organization, administrators can manage accounts efficiently via the backend. Navigate to Organization Settings > Employee Management, select the relevant employee accounts, and use the Bulk Operation feature in the top-right corner to perform batch actions.

The Bulk Operation feature allows for the batch processing of the following actions:
- Activate/Deactivate Account
- Delete Account
- Reset Password
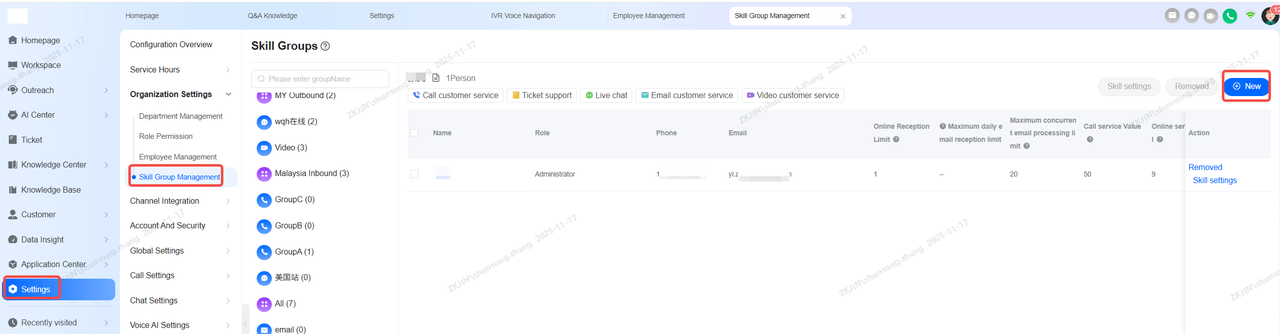
1.5 Skill Group Management
A skill group is an organized unit of agents, designed to route customers to the appropriate support channel. A single skill group can handle one or multiple service types (e.g., call center, online chat, tickets).
Agents in the skill group will inherit all the connection capabilities assigned to it. When a business inquiry or task is routed, agents in the assigned skill group will receive it based on the configured assignment rules.
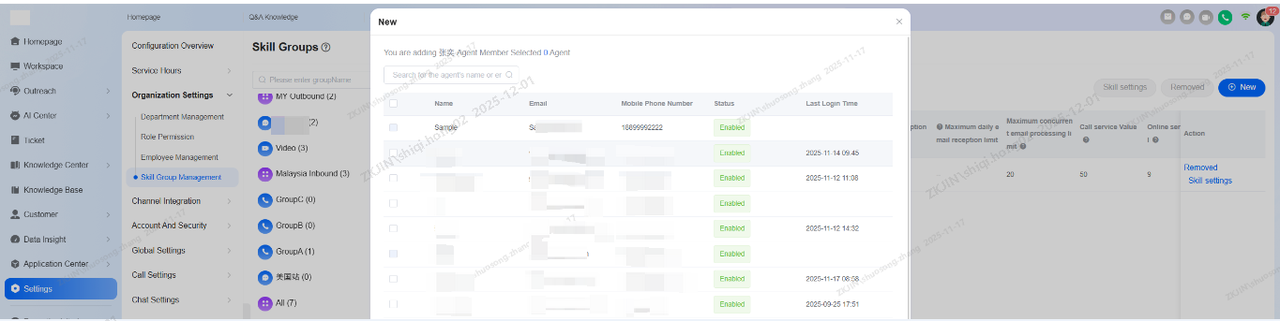
Create/Edit Skill Group
You can add or edit skill groups. In the pop-up window, edit the skill group's name and select the capabilities it will possess (e.g., call center, online chat, tickets). Once capabilities are selected, the skill group can be assigned to corresponding business workflows.
Navigate to Configuration Overview > Organization Settings > Skill Group Management > New/Edit button.