
1.Brief Introduction
Ticket system is a tool for agents to submit or record issues. Tickets can be created from online chats, calls, and email channels. They are also key component for automating task assignment.
-
Create Ticket
-
Ticket Center
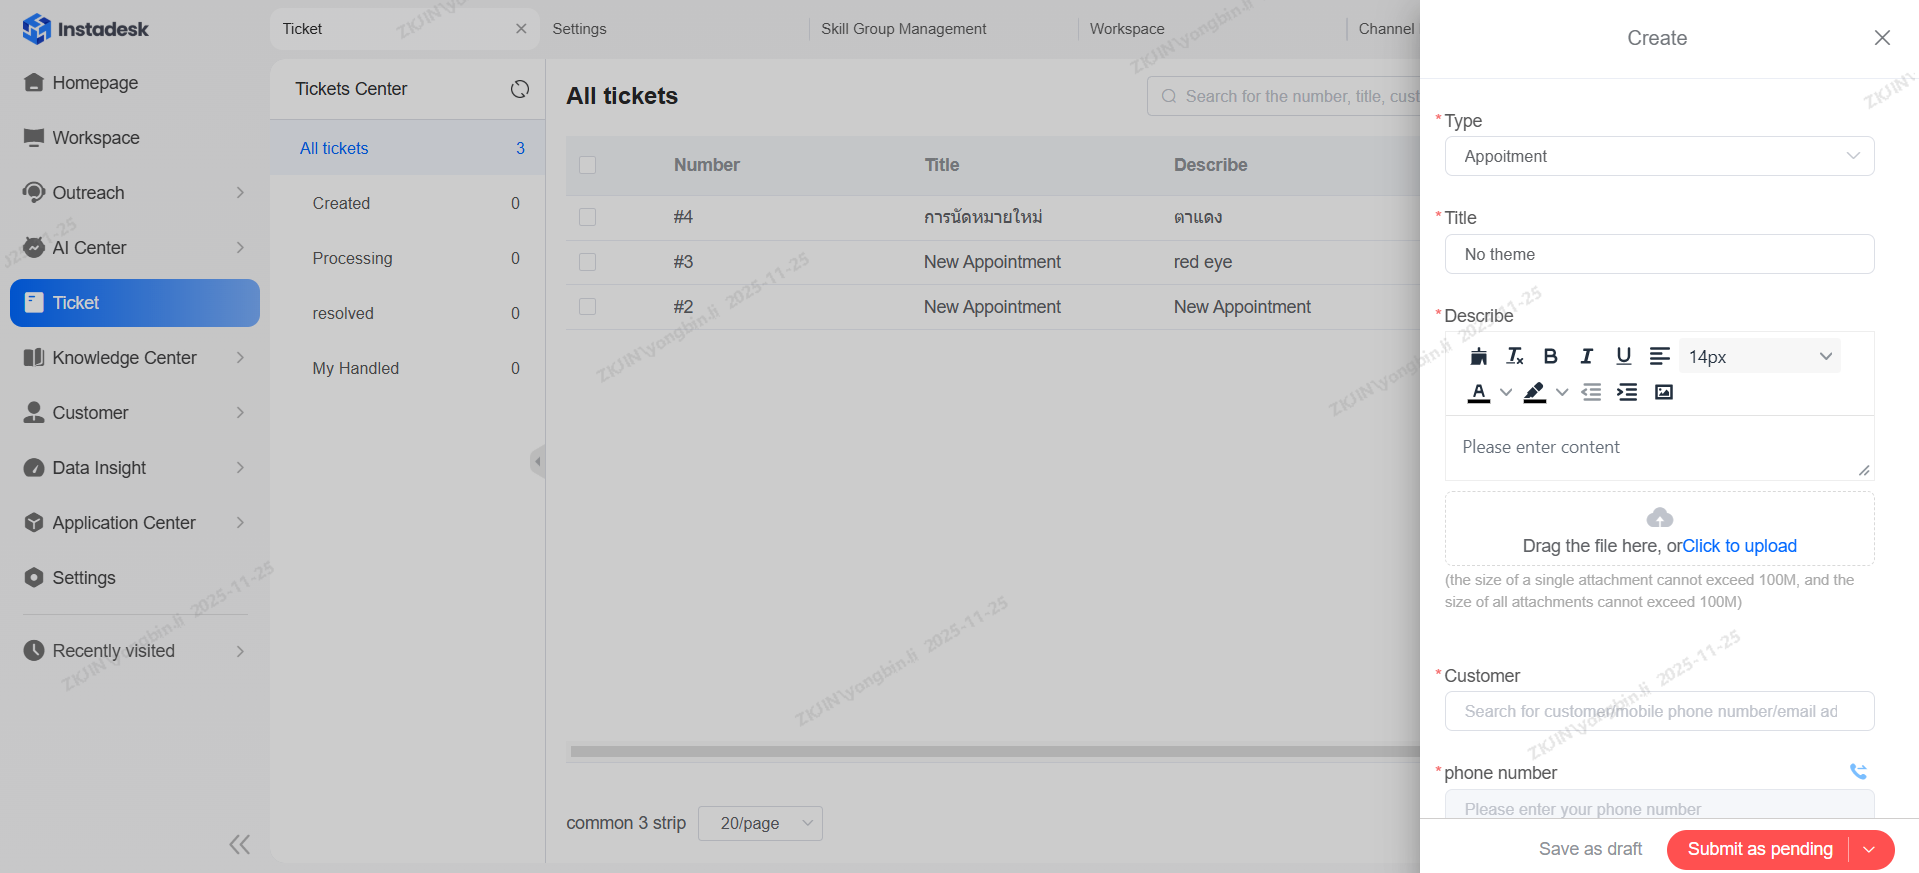
To create ticket, click the Create button on the top right side of the page upon entering the Ticket Center
Navigate to Ticket > Tickets Center > Create button

Handling Ticket
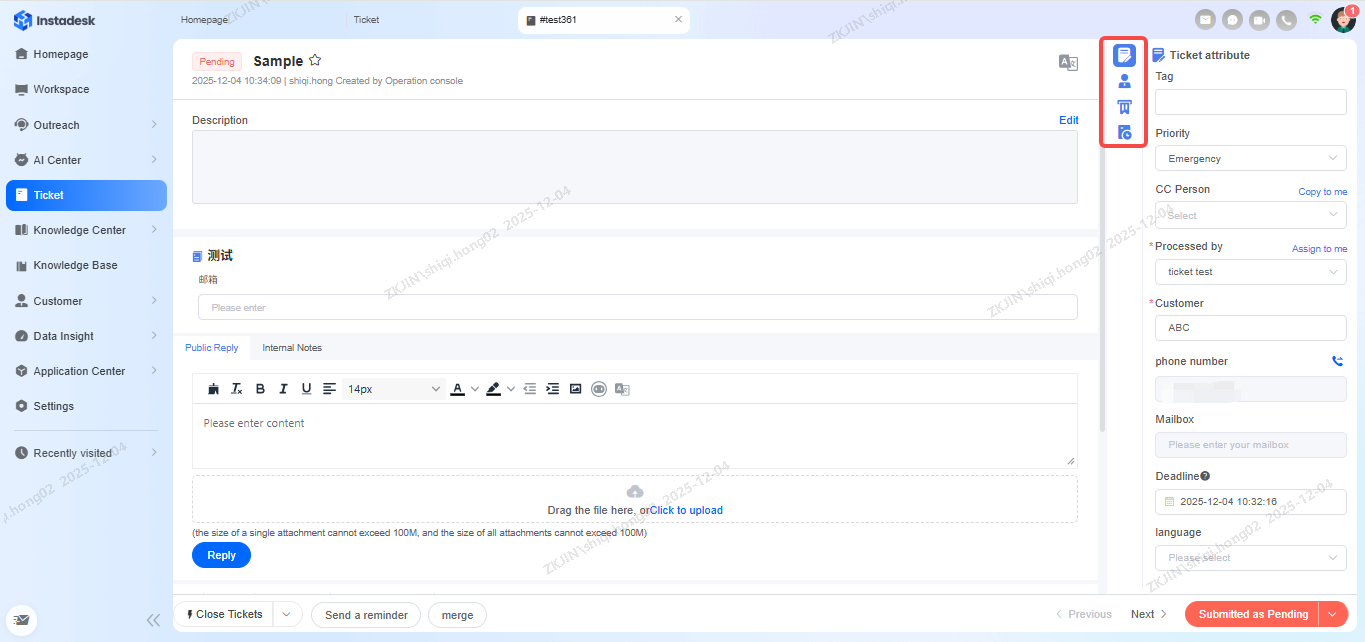
To handle the ticket, click on the specific ticket that wants to be handled

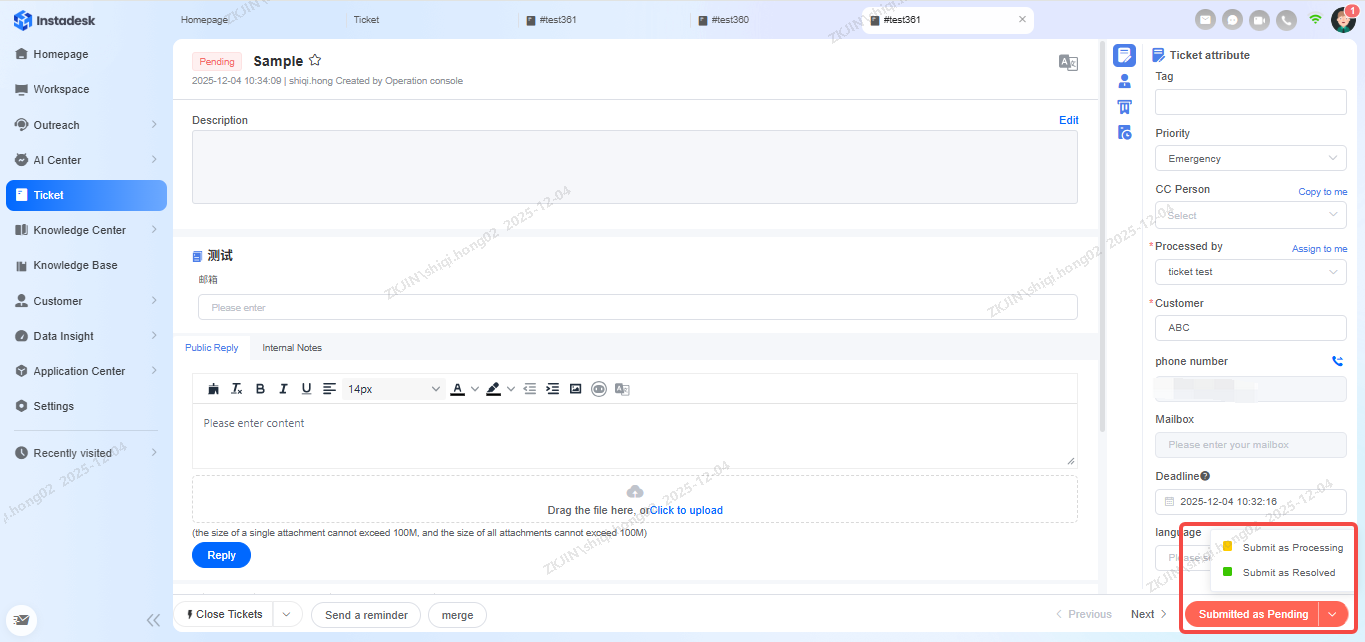
Upon clicking the ticket, this page will appear where you can view the ticket content, reply, edit, and perform other operations. On the right side of the page, as highlighted in the image below, you can also view ticket and customer details, related tickets, and records of previous ticket history.
Ticket: Reply
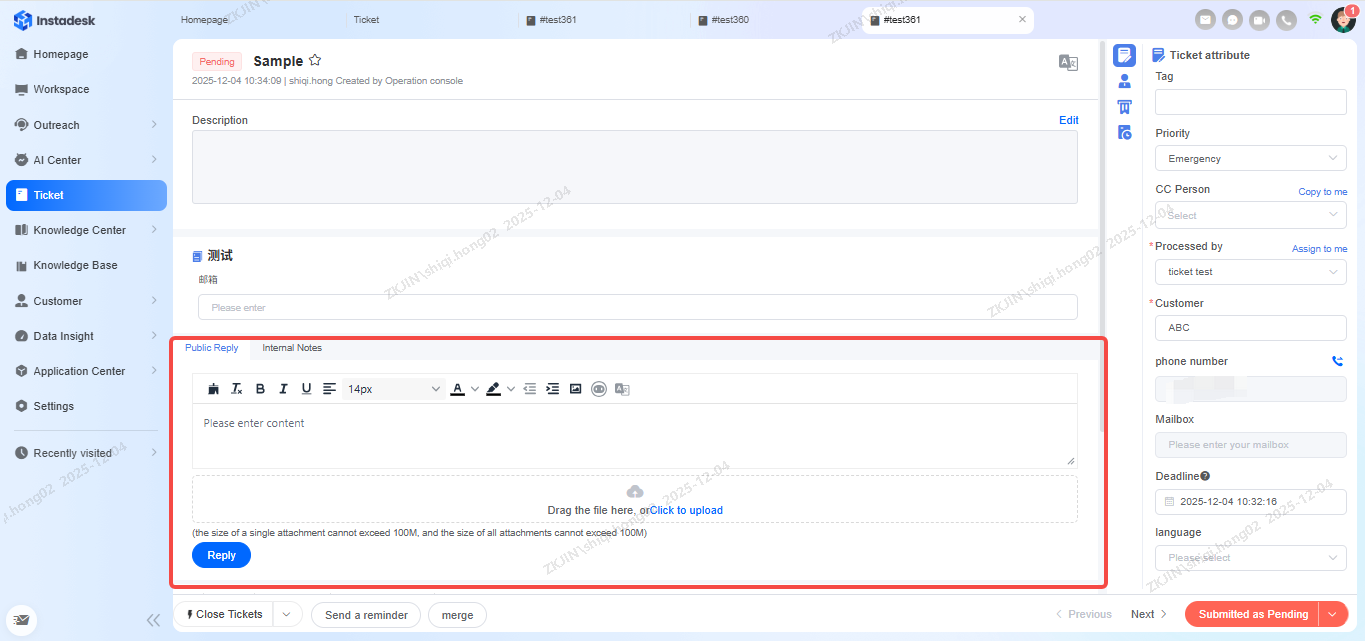
To reply to the ticket, enter your response in the following textbox as highlighted in the image below, attaching files to the ticket is supported.
Ticket: Submit
After handling the ticket, it can then be submitted according to its status on the bottom right side of the page. The statuses that are available are:
-
Resolved
-
Processing
-
Pending
Ticket: Delete/Close
To delete or close tickets, it can be done on the bottom right side of the page, by clicking the arrow more options will appear. Both closed and deleted tickets will no longer be circulated and cannot be edited or processed again.

-
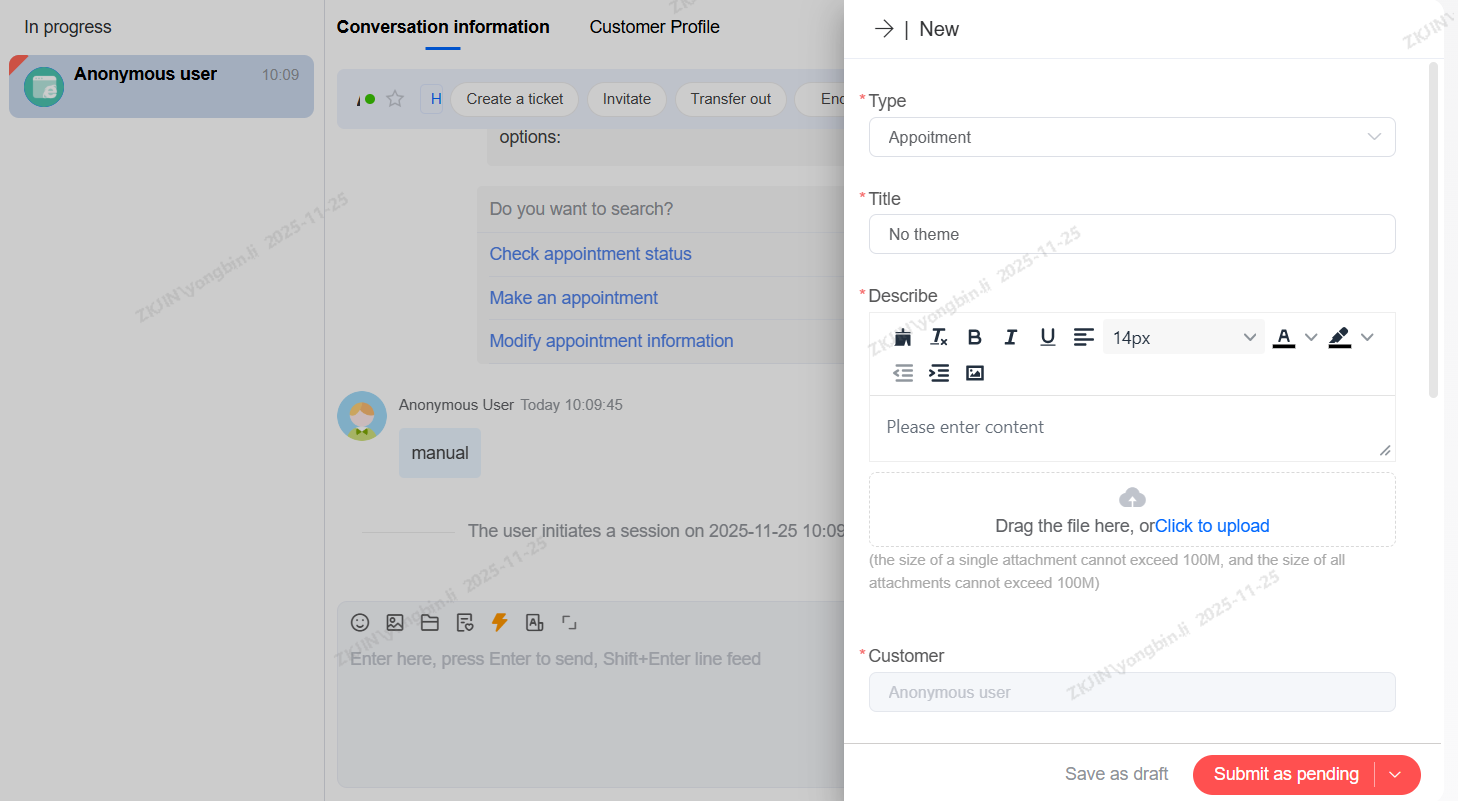
Online Chat Create Ticket
To transfer online chats to tickets, on the right-hand side of the page, under Related Tickets, click New
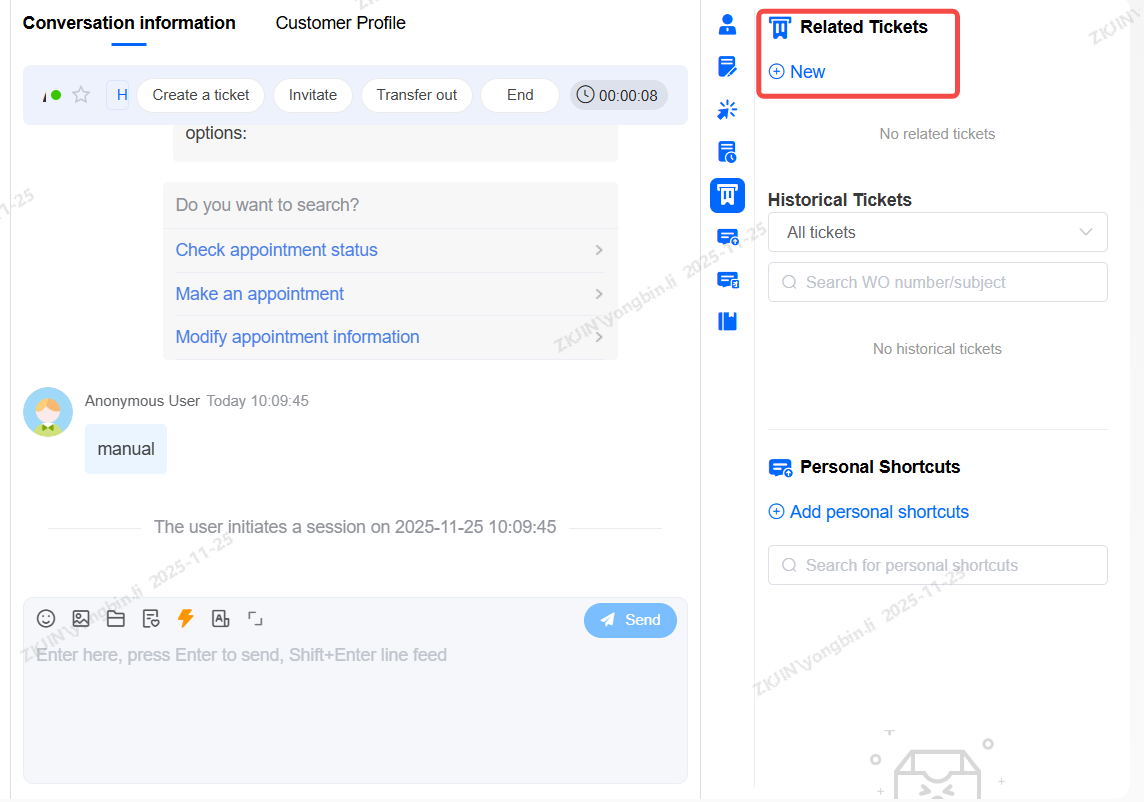
After clicking New, the following page will appear, similar to creating a ticket, enter in the required fields and submit as pending.
-
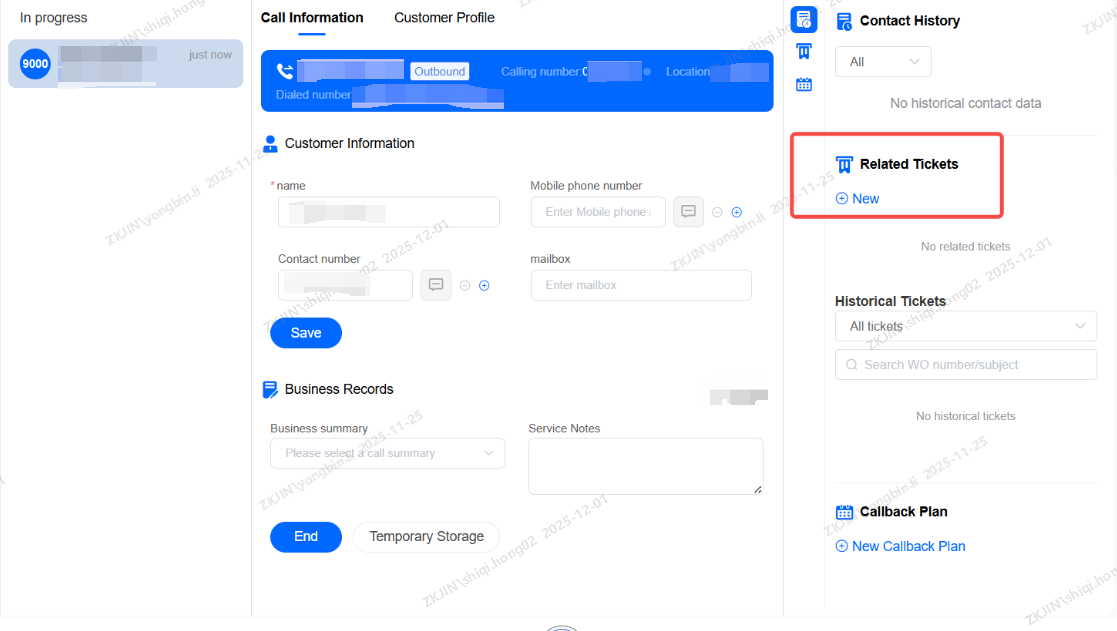
Create Ticket while calling
To create ticket while on the call, the process is the same as the online chat. Click on New under the related tickets.
-
Ticket Field Configuration
-
Create Ticket Field
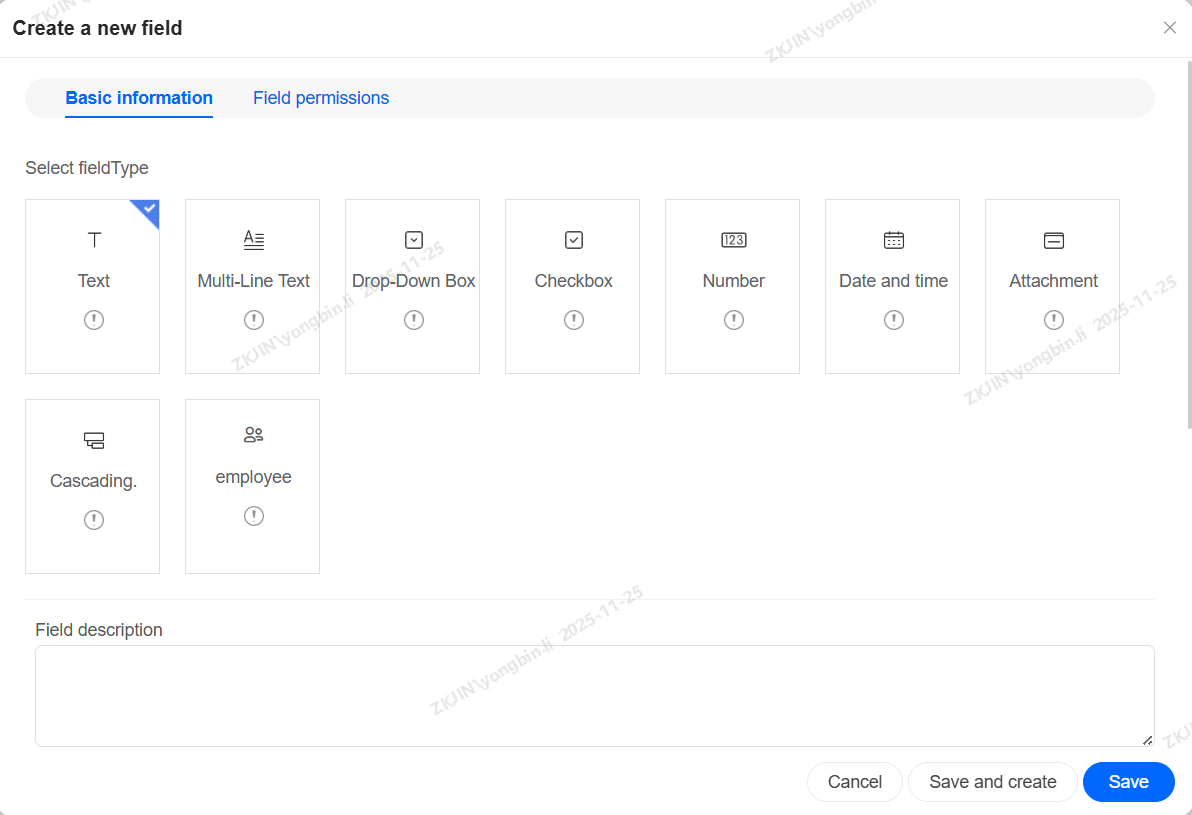
Instadesk system allows customizing ticket forms. These fields can then be shown in the ticket list if you configure the Column Settings. Navigate to Configuration Management > Ticket Configuration > Ticket Customization > Ticket Fields. You can add various field types to build your own forms, including:
-
Text Field
-
Check Box Field
-
Drop-down List Field
-
Cascading Field, etc.
-
Ticket Form and Type
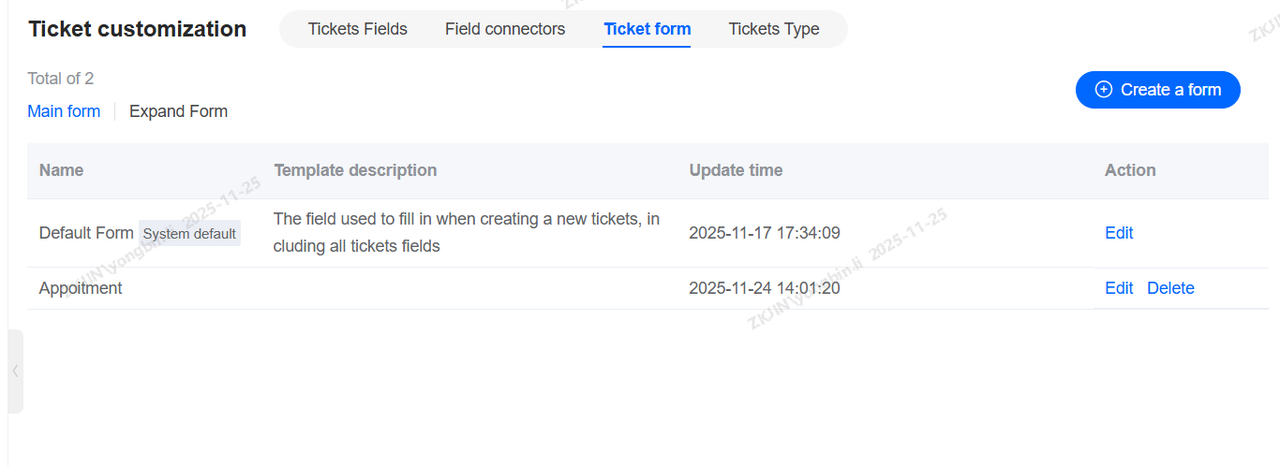
After creating ticket fields, you need to create ticket form and ticket type. When agents create tickets , they can choose which type of ticket they want.
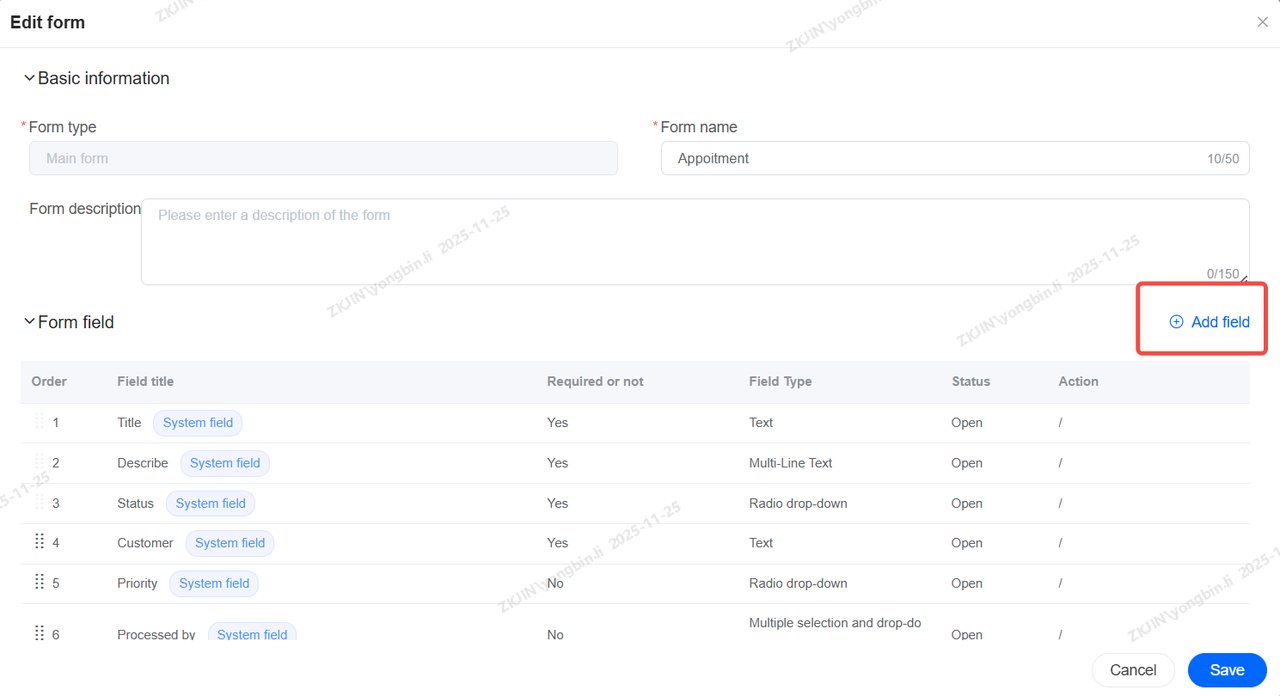
Step 1: Create a new ticket form and add the ticket field into this ticket form.
Step 2: Associate ticket form to ticket type

-
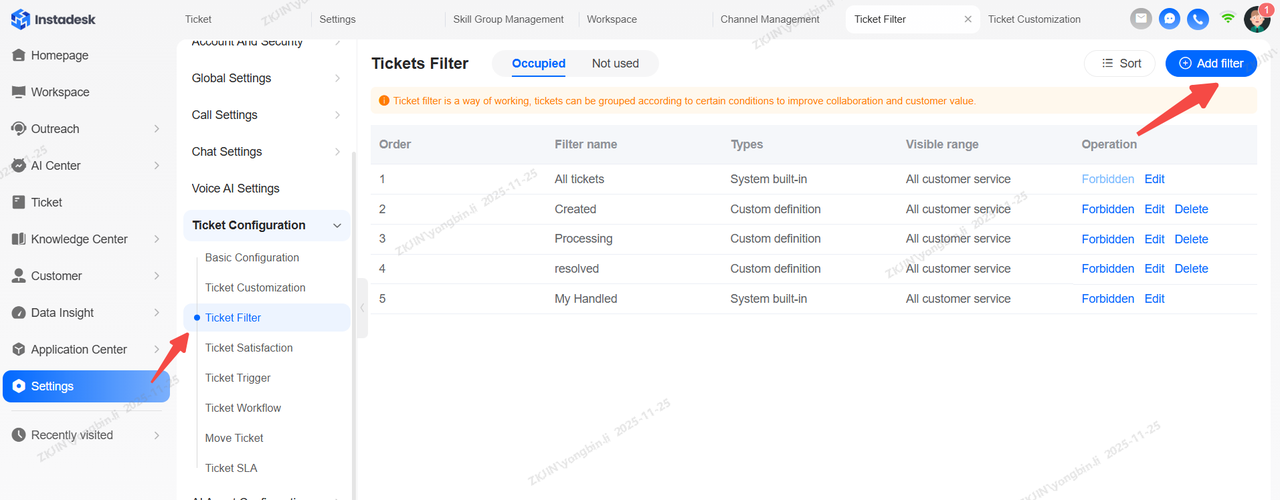
Ticket Filters
Ticket Filters help users quickly find specific tickets. You can predefine and save filter conditions, and all tickets matching those criteria will be displayed within the filter
-
Add Filter
-
Filter Property Configuration
Filter conditions, sorting methods, and visibility scope are all customizable.
Custom ticket fields can also be used as filter criteria. For example, you can add a cascading field for Product Model to track all after-sales requests, then use a filter to quickly categorize tickets by model.

-
Ticket Triggering
Ticket Triggering is a core component of the ticket system, and its configuration requires a clear understanding of ticket assignment logic.
At its core, a trigger is an If-Condition – Then-Action process. When a specific ticket event occurs or a time condition is met, the system checks if the defined conditions are satisfied. For example, Ticket Status = In Progress and Creation Time = Within Business Hours.
-
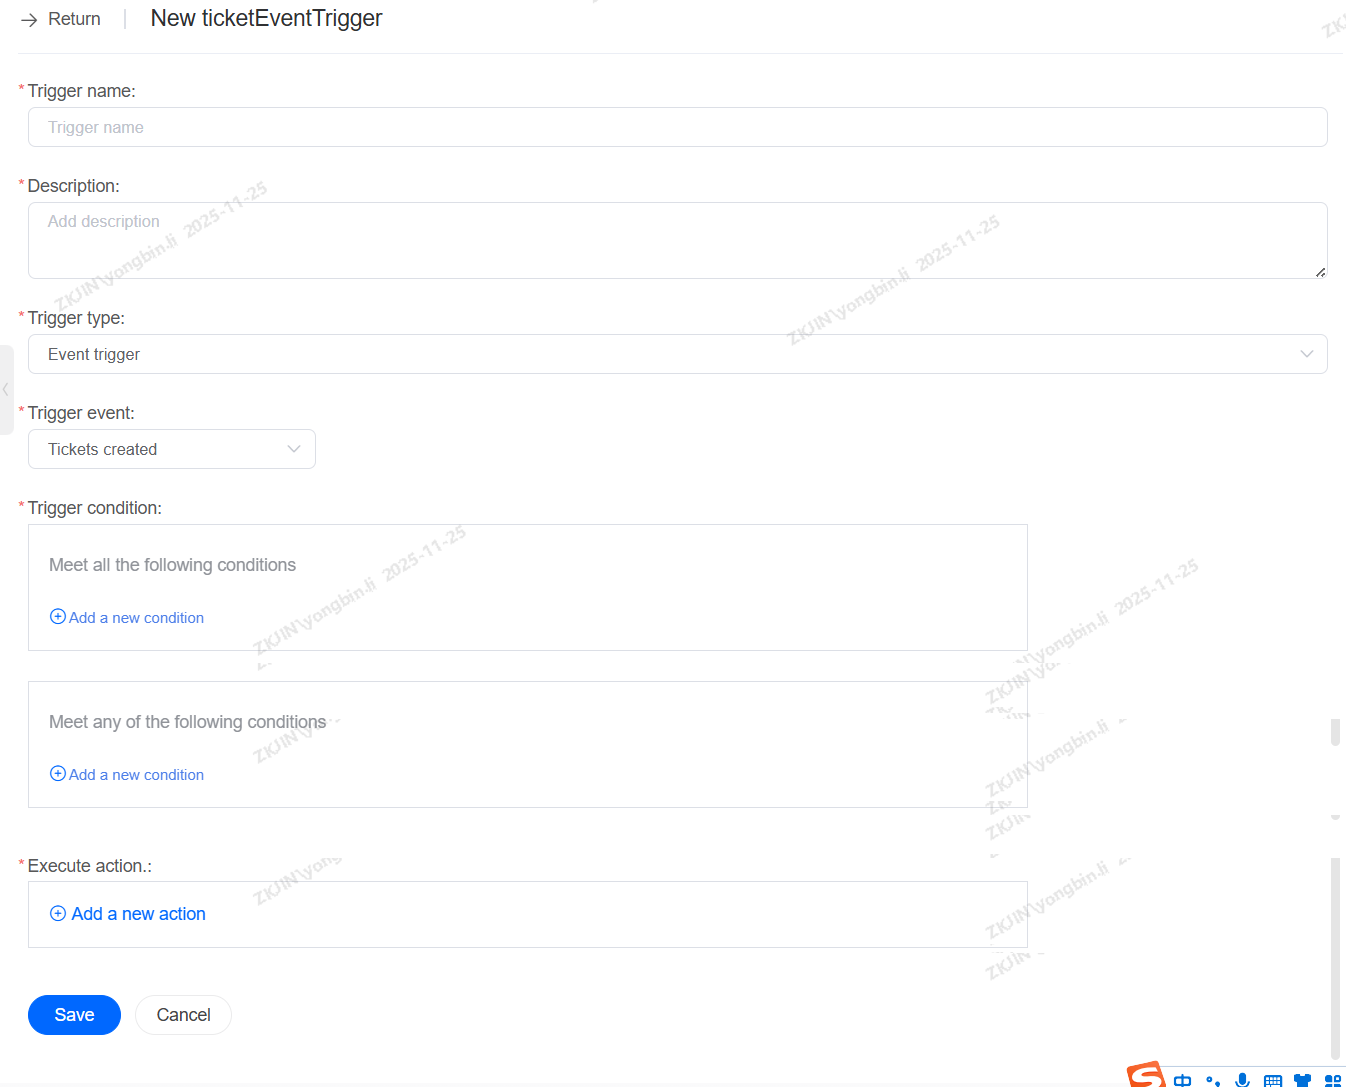
Event Triggering
Event Trigger executes an action based on a specific event related to a ticket. It follows an "If (Event) AND (Conditions) → Then (Action)" logic. When a condition is met, it will execute the preset action.
-
Time Triggers
Time Triggers operate differently from Event Triggers. A Time Trigger evaluates all tickets that meet its conditions at the top of every hour, and then executes the defined actions on them.

-
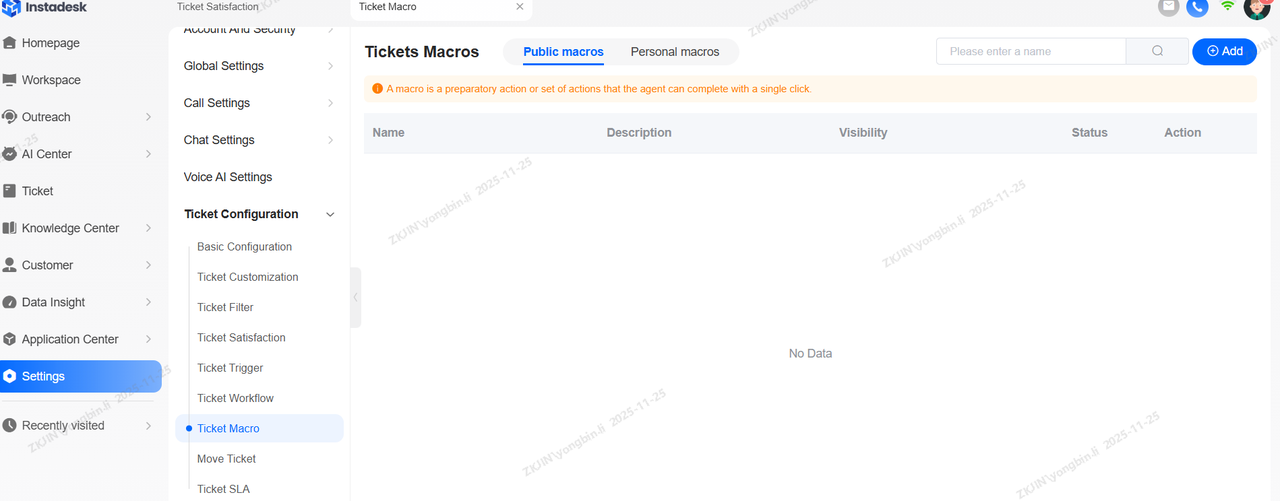
Ticket Macros
Ticket Macros are an efficiency tool where a single macro acts as an integrated button. Clicking it once allows an agent to execute multiple predefined actions simultaneously. Navigate to Configuration Management > Ticket Configuration > Ticket Macro. The macro can be created by clicking the add button on the top right side of the page.
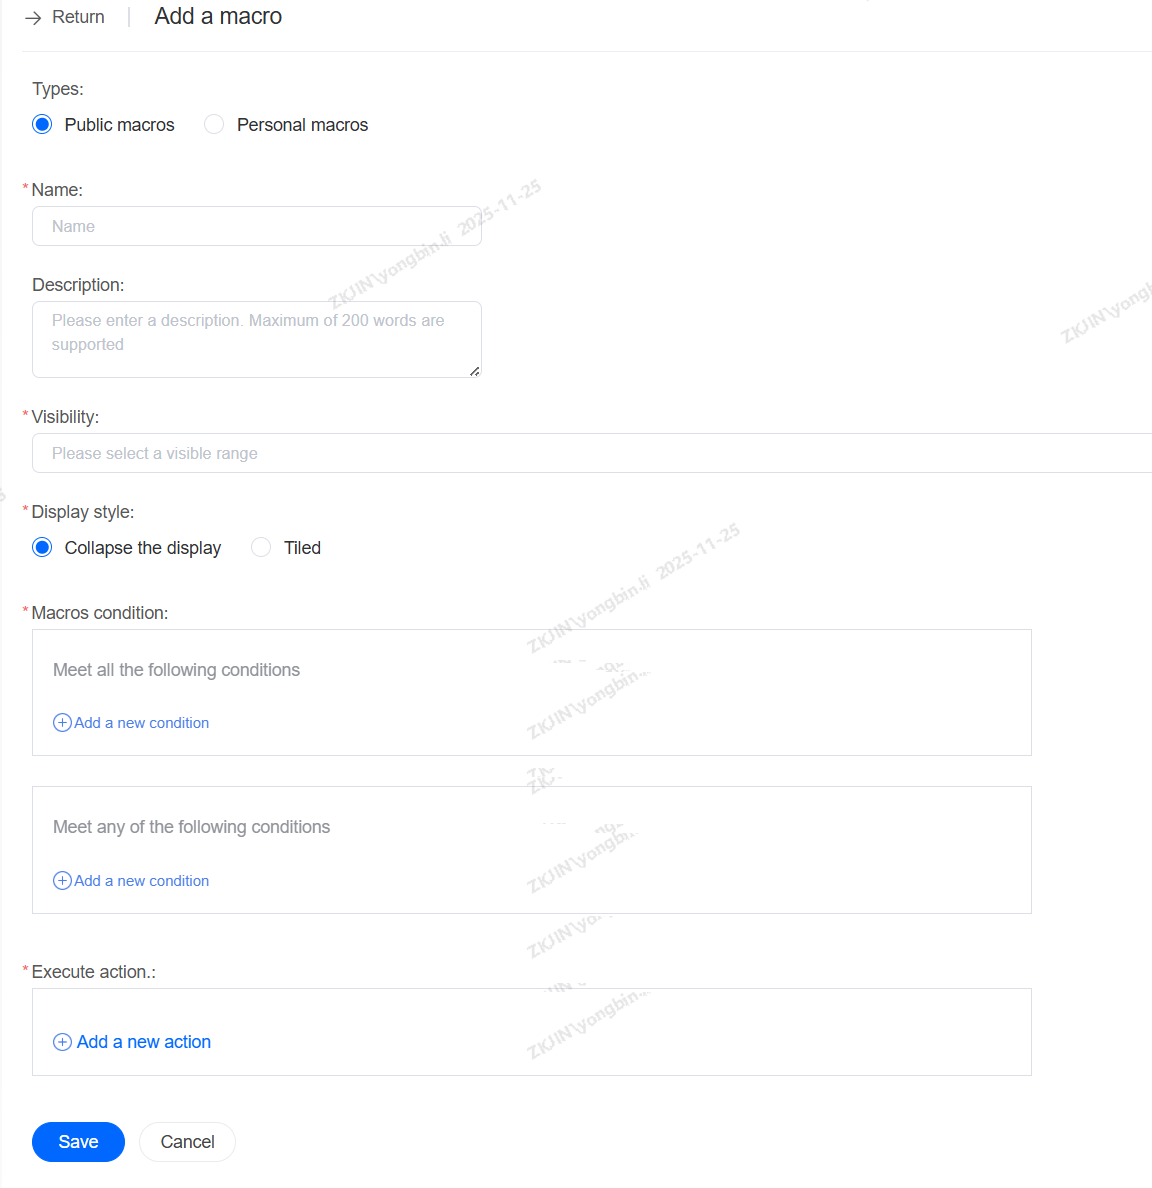
Upon creating the macro, the following page will appear. In this page, you can configure who can use it, enter its name, and the conditions and actions for the macro.
-
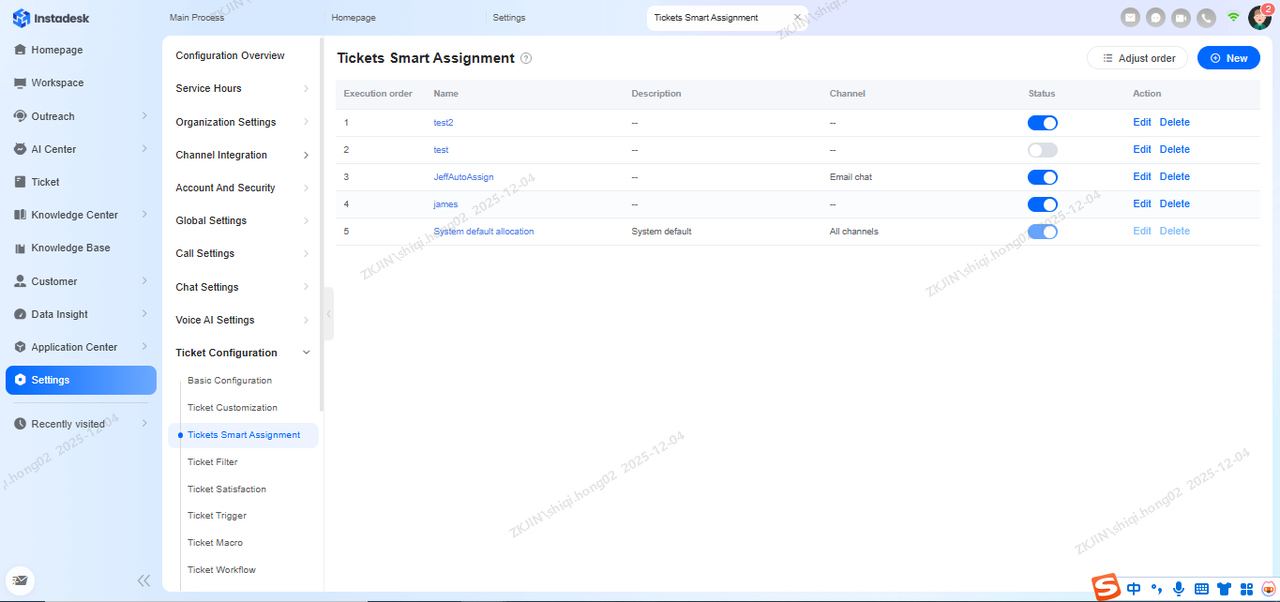
Tickets Intelligent Allocation
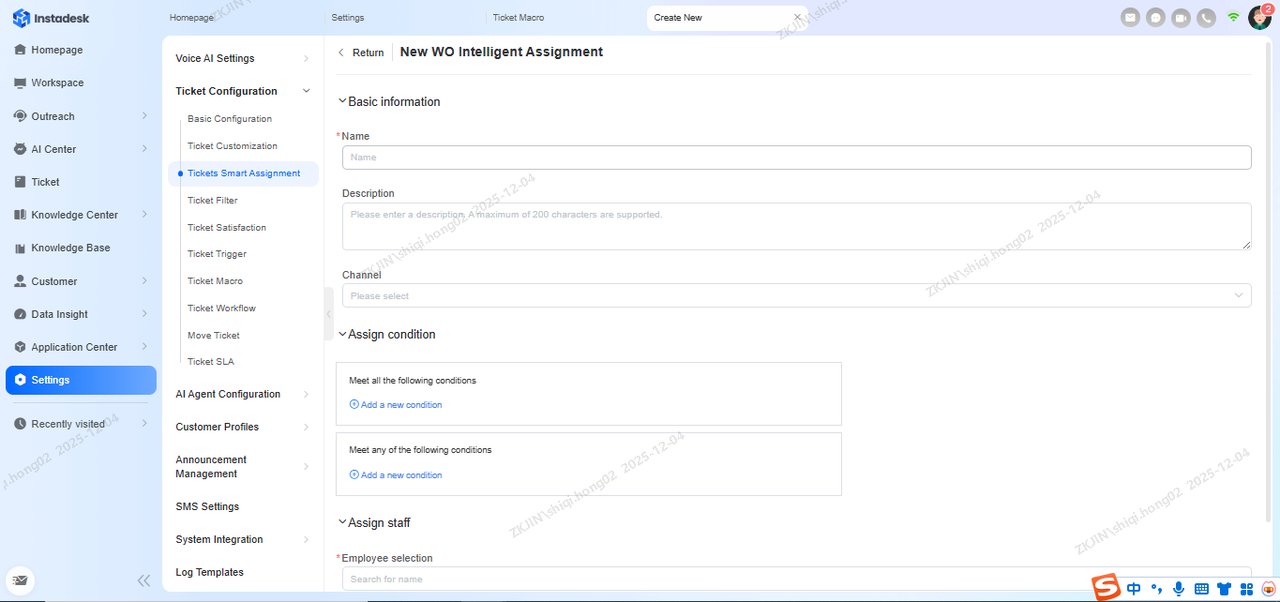
Customize rules to automatically assign tickets based on type and customer. When a ticket matches multiple rules, they execute in the defined priority order, with only the first matching rule applied. To configure navigate to: Configuration Management > Ticket Configuration > Intelligent Ticket Allocation.
Creating the assignment has the same process as previous features, filling in the required fields.
Upon clicking, you will enter this page, fill in the name, conditions for the allocation, and the agent to allocate the ticket to when the condition is met.